
こんにちは、ゴエです。
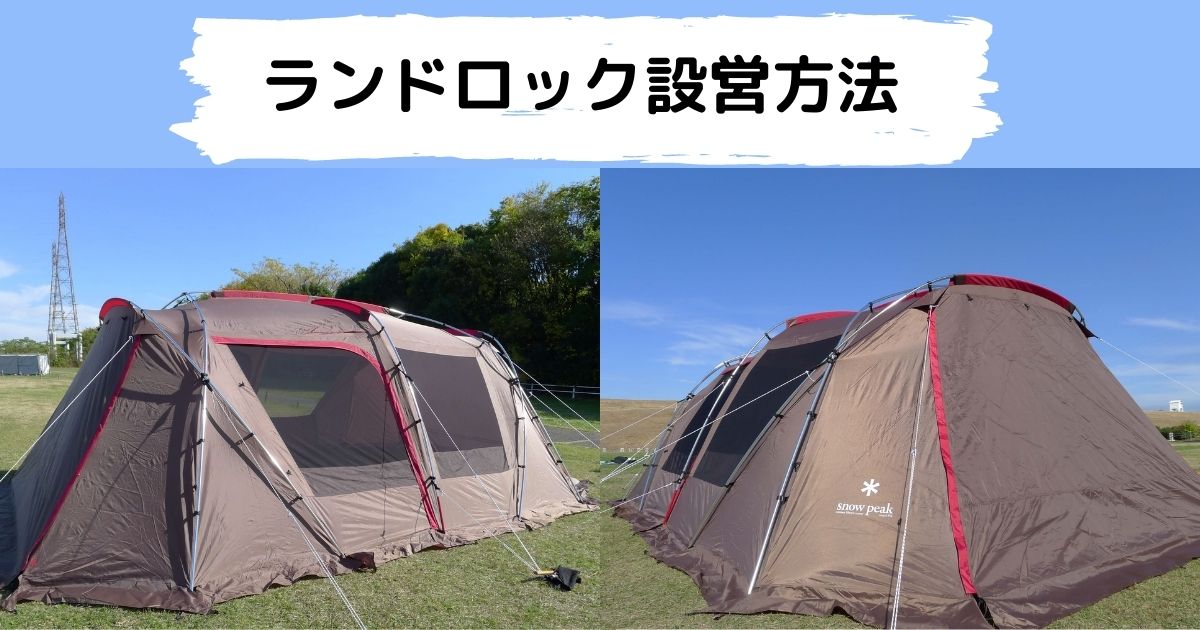
キャンプ好き5人家族の我が家ではスノーピークの「ランドロック」(テント)を使用してキャンプライフを楽しんでいます。
私たち夫婦がランドロックを初めて設営した時、このようなことで悩みました。
- どうやって設営していいか分からないし、自信がない。
- 設営してみたけど、フレーム(ポール)が浮いてしまう。
- シワが多くて、ピン張りできない。
取説と公式YouTubeを見ながら設営しましたが、それだけでは上手く設営できず悪戦苦闘しました。
私たちと同じようにランドロック設営で困っている方へ、この記事で取説以上に詳しく丁寧に説明します。
手順に沿って設営すれば、間違いなくキレイに設営できるはずです!
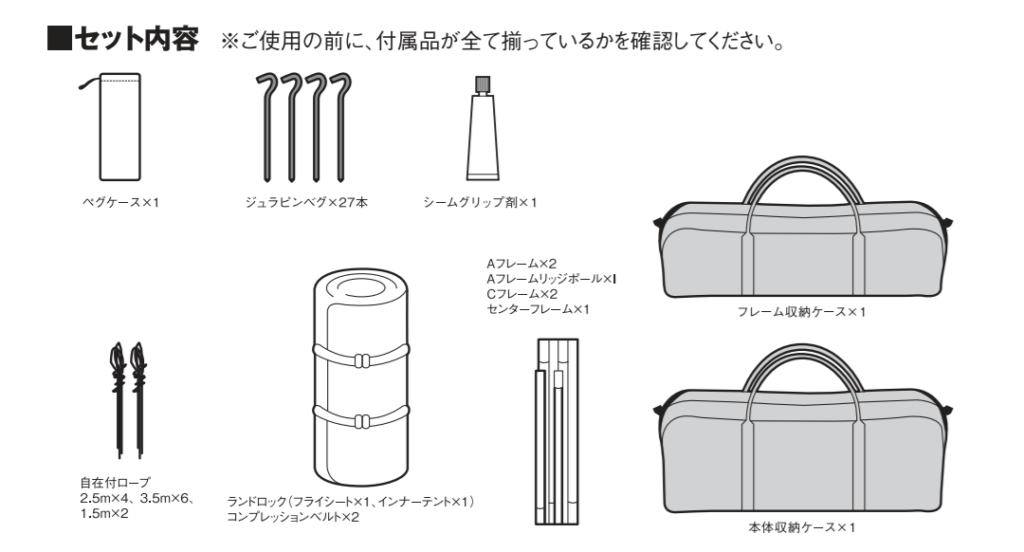
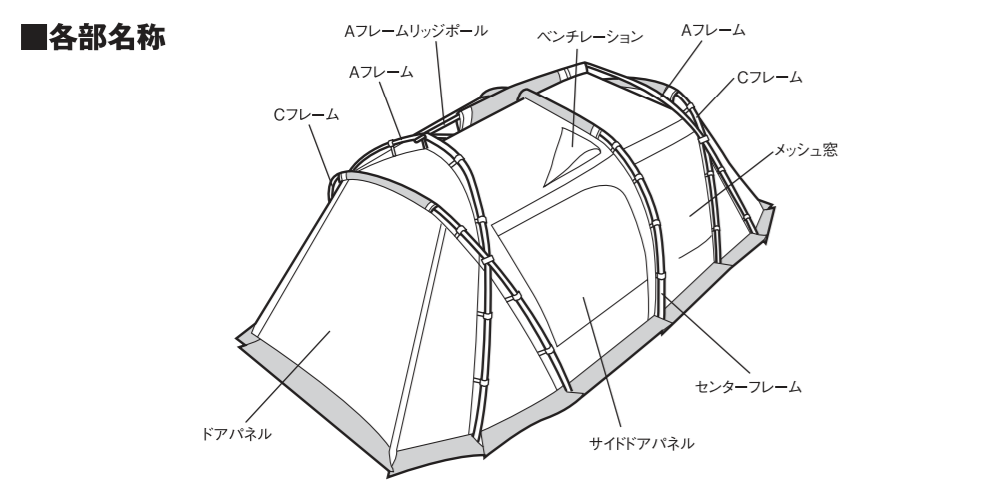
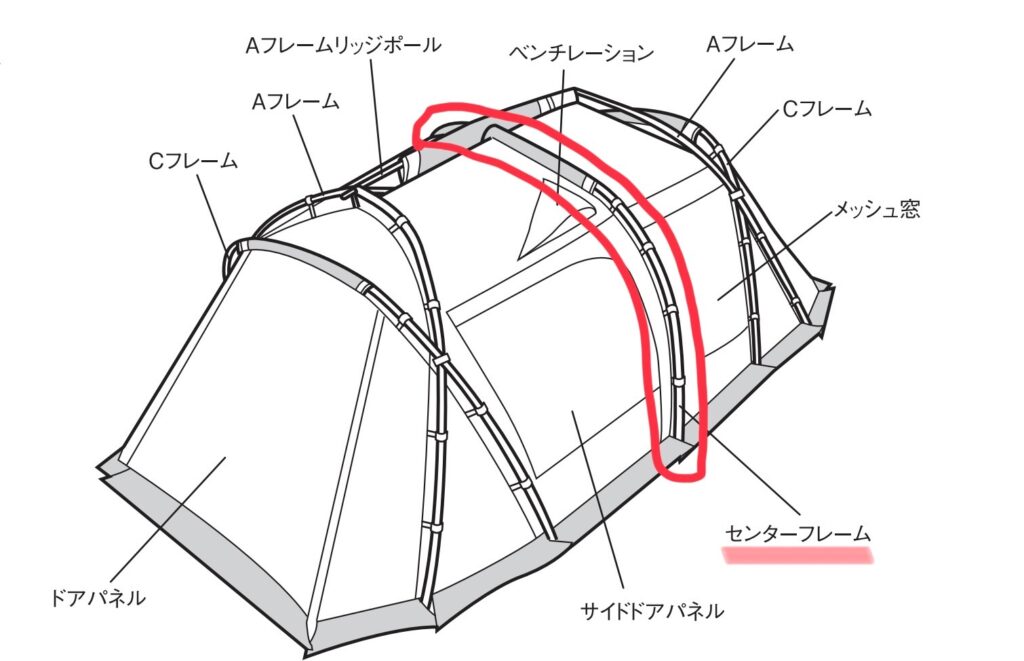
セット内容物の確認と各部名称
設営を始める前に付属パーツを収納ケース(袋)から取り出し、内容物を確認してください。
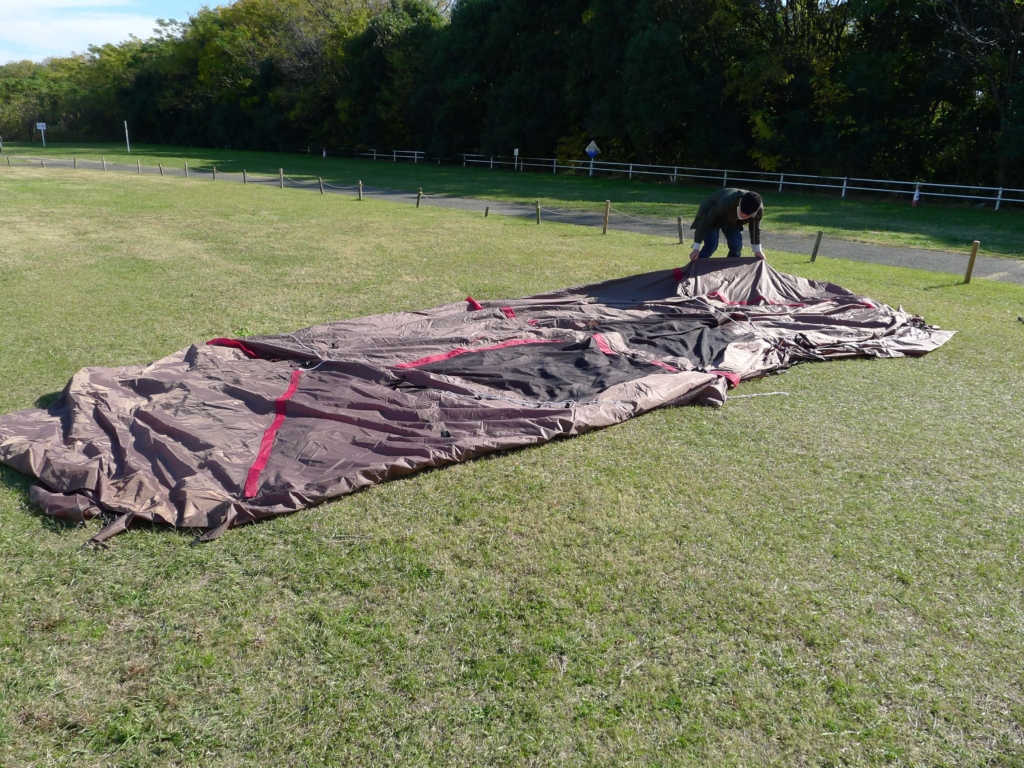
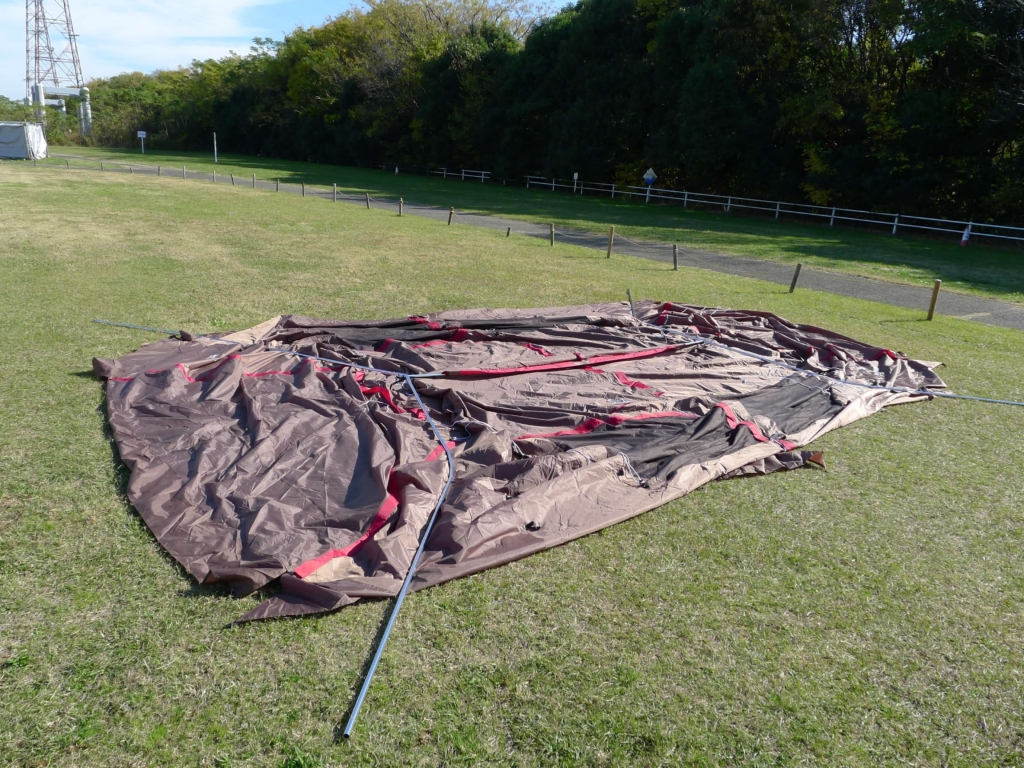
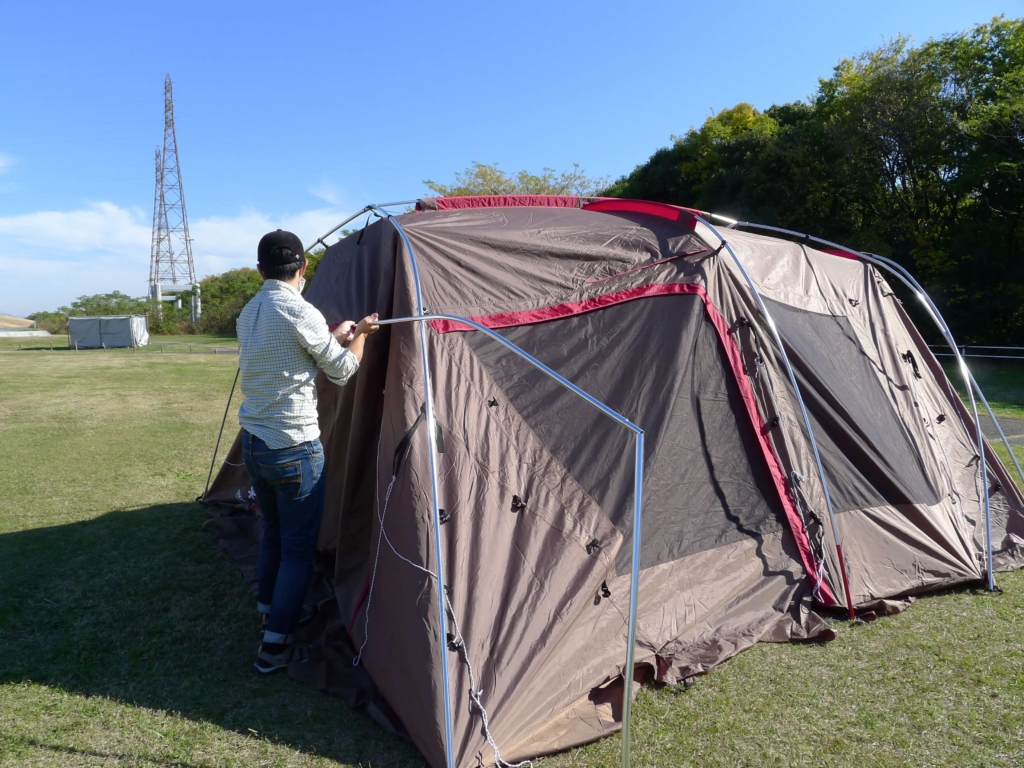
本体シートを広げる
本体ケースから本体シートを取り出し、広げていきます。
完成後をイメージしながら、テントの場所や向きを考えて広げてください。
本体シートは全て広げず縦半分に畳まれた状態で広げてください。
すべて広げてしまうと大きすぎて位置や向きの調整が大変になります。
設営後のイメージをしながら、テントの向きを決める。
サイドドアパネルの赤いフレーム方向を見ると、入り口側を把握しやすいです。
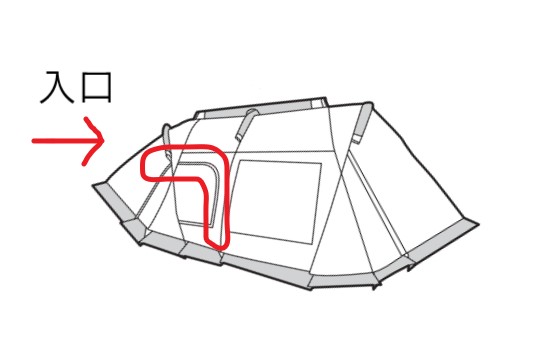
位置と方向が決まれば本体シートを広げます。
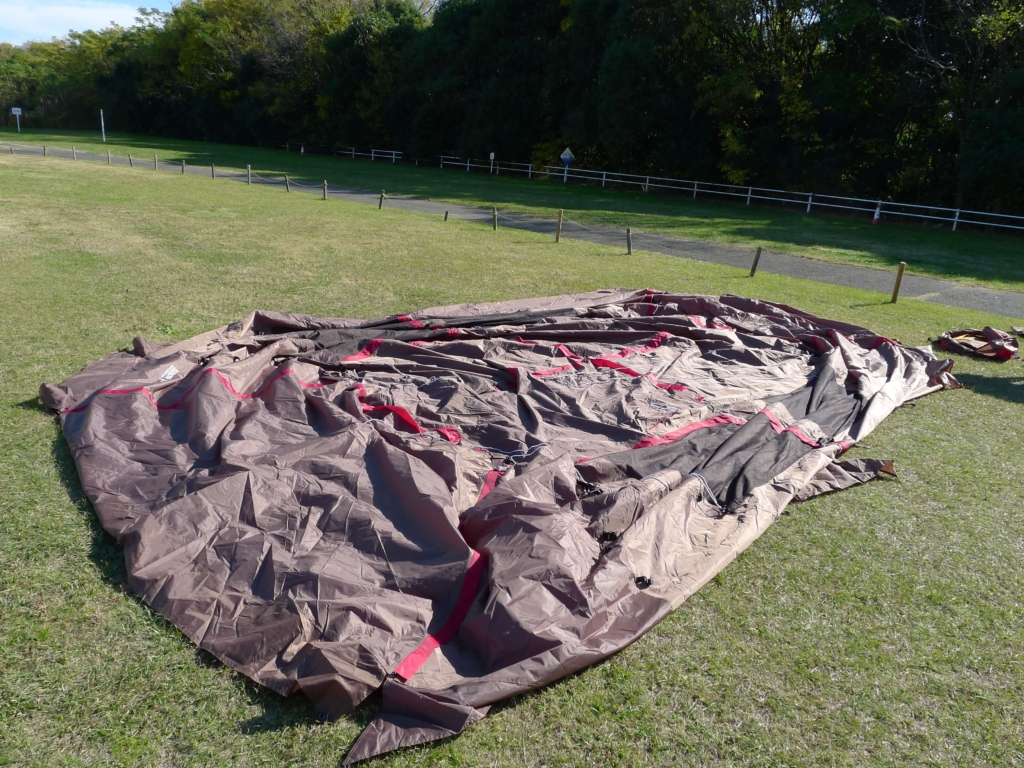
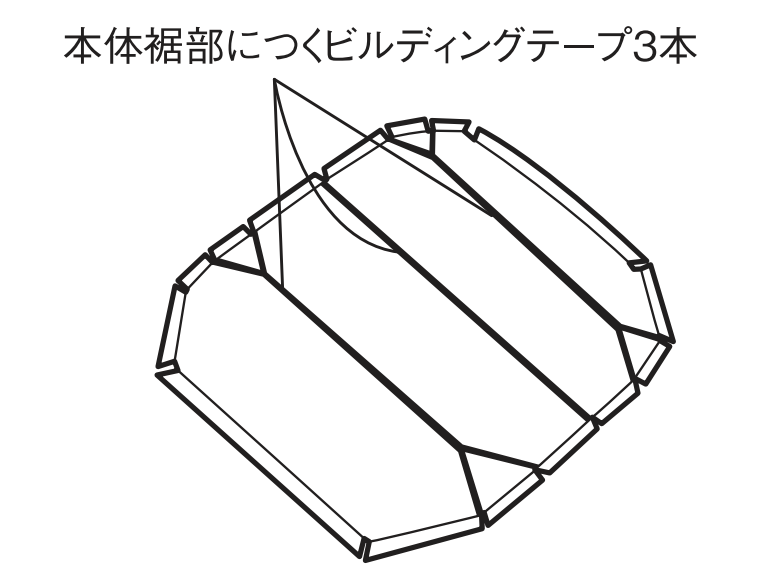
テント内部のビルディングテープ3本が接続されていることを確認
テントの背骨になる中心ポールの取り付け
テントの背骨部分になる「Aフレームリッジポール」を取り付けます。
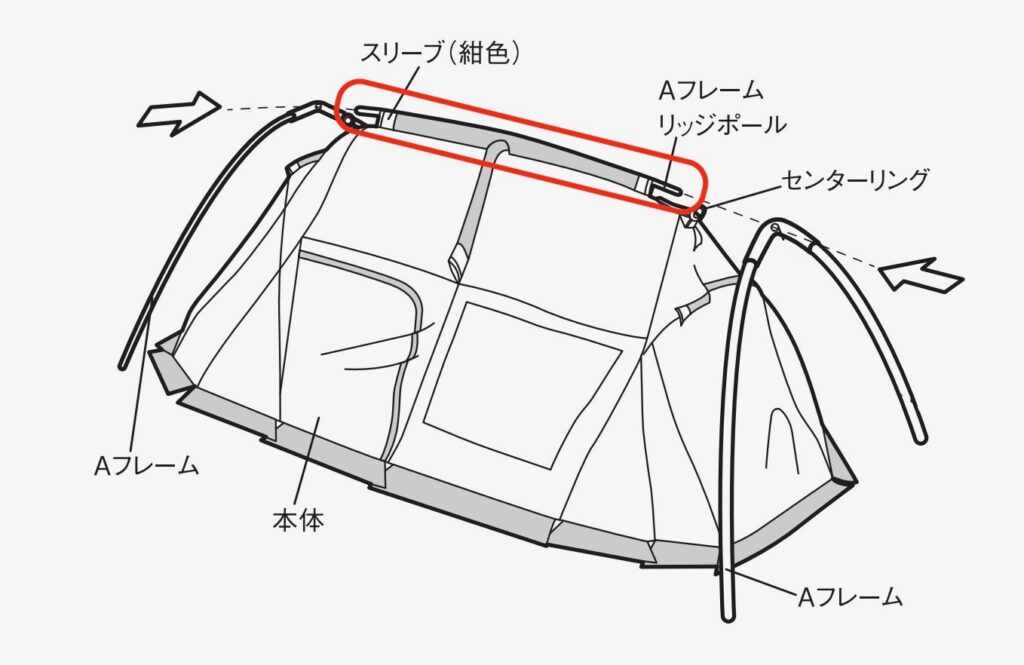
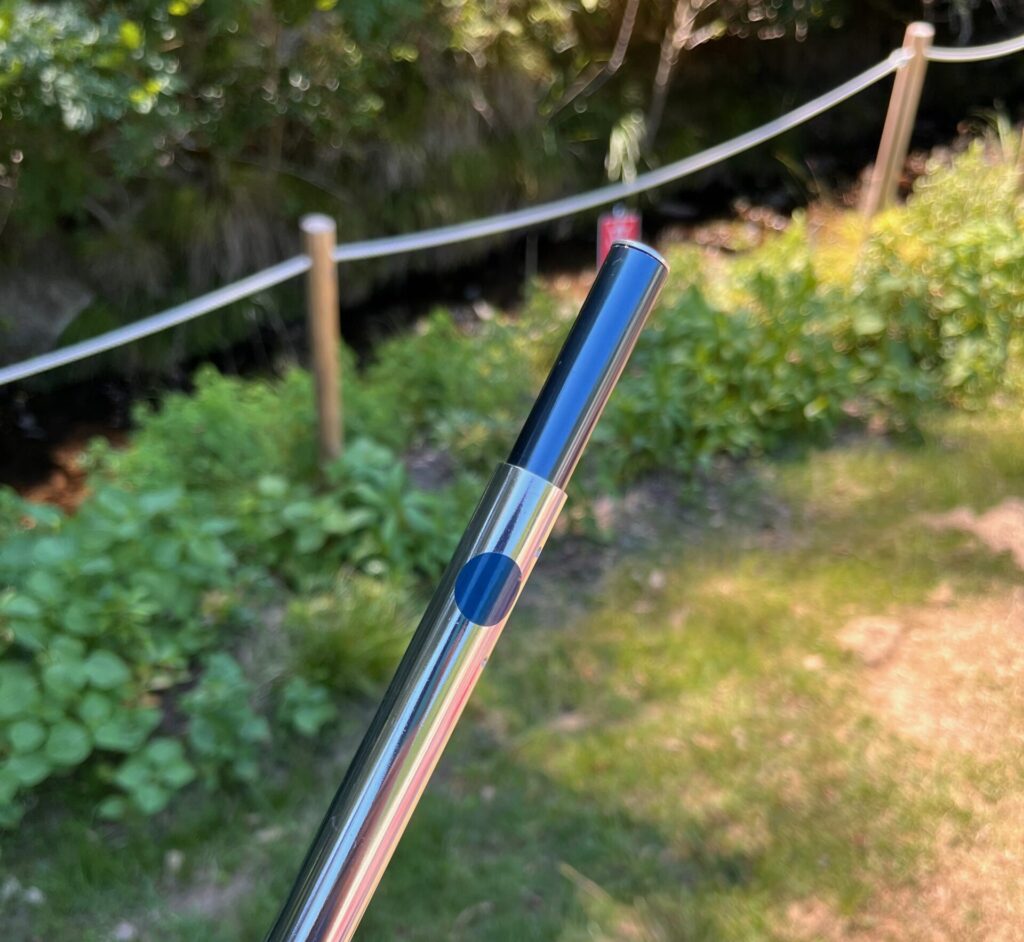
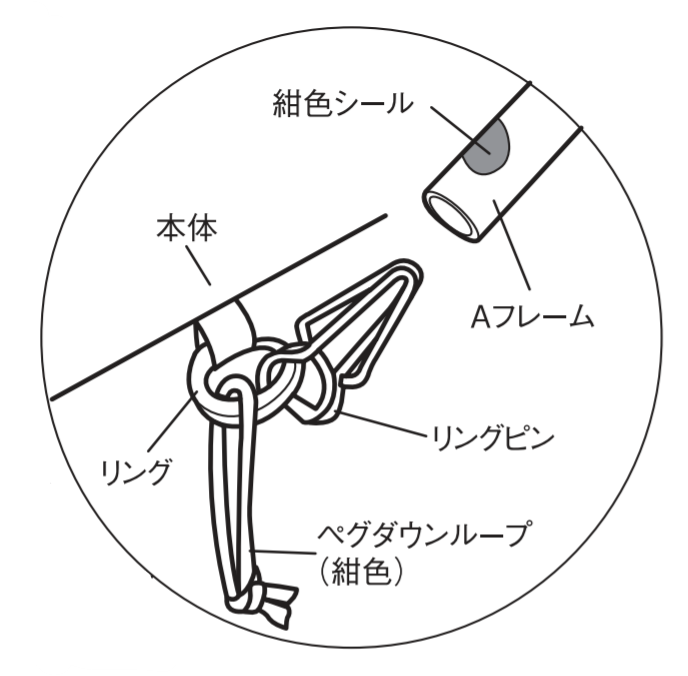
Aフレームリッジポールは紺色テープが付いたポールです。
本体シート中心部の紺色テープが付いたスリーブにAフレームリッジポールを通します。

Aフレームリッジポールを取り付けた状態がこちらです。

Aフレームの取り付け
先ほどのAフレームリッジポールの両端にAフレームを取り付けます。
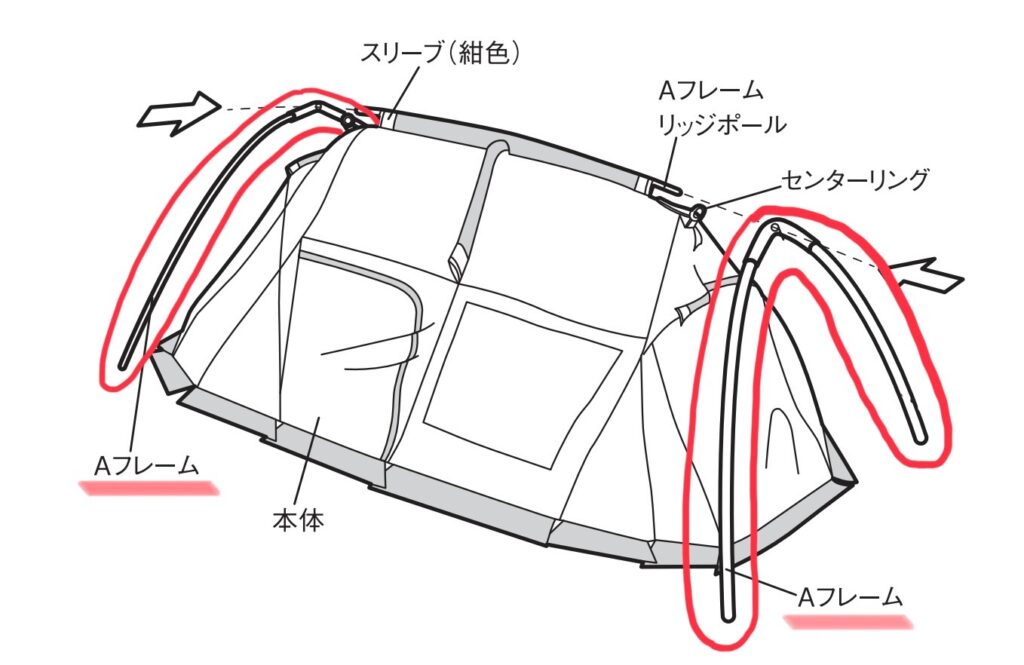
紺色テープが2つ付いたポールが「Aフレーム」です。
このAフレームの穴にAフレームリッジポールを通します。
紺色テープが2つ付いたAフレームを準備します。
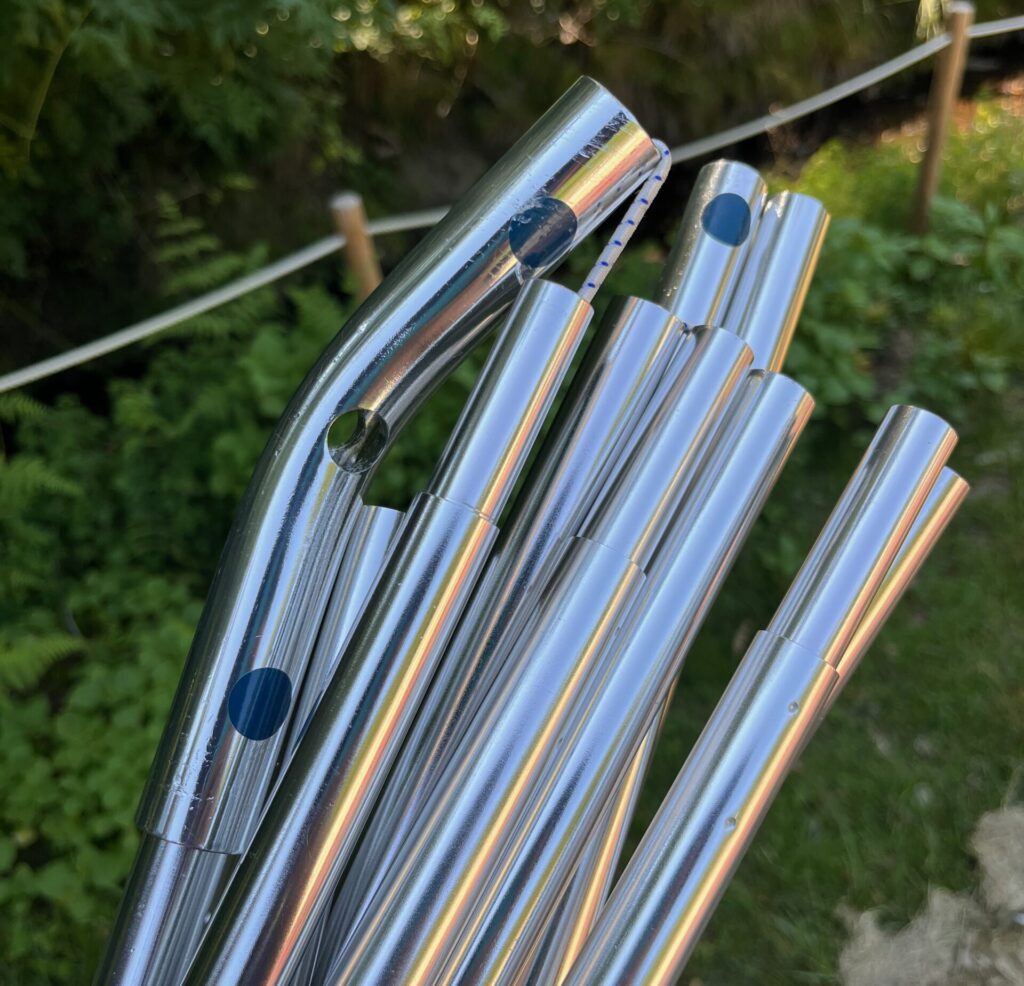
AフレームにAフレームリッジポールを差し込む
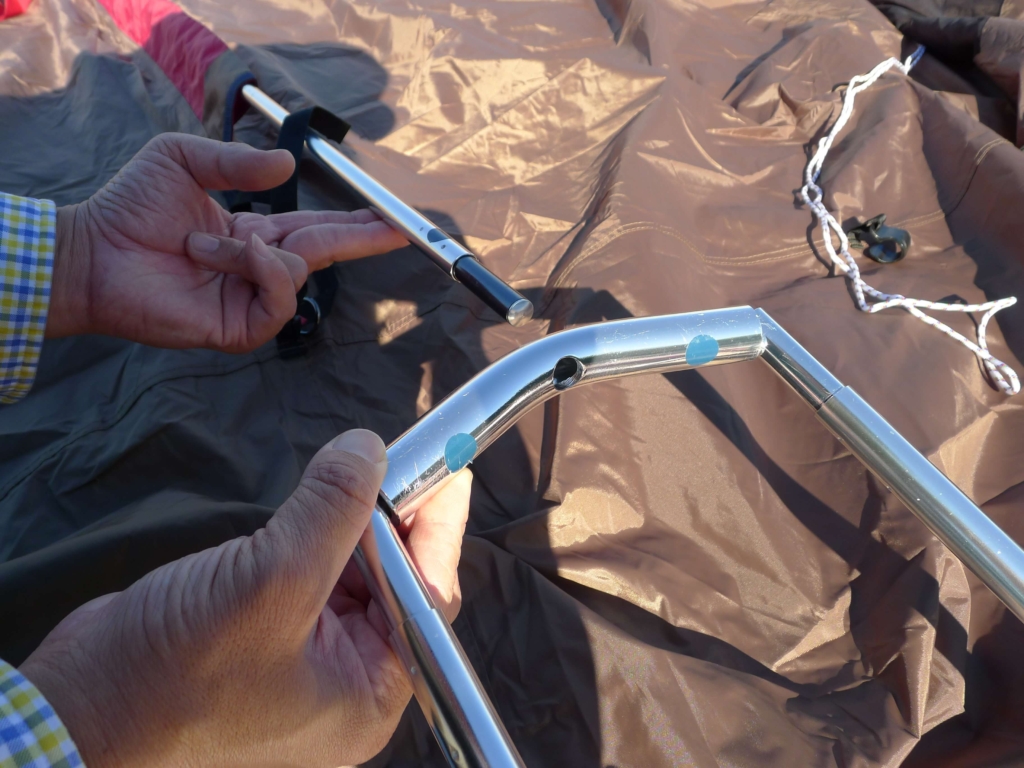
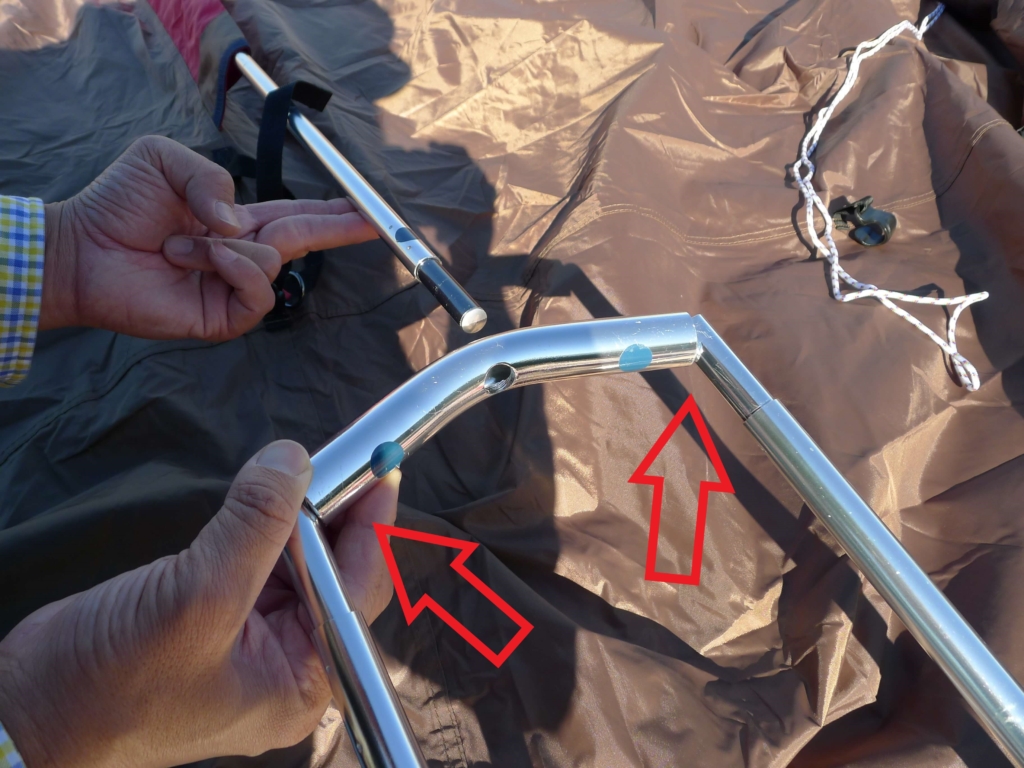
紺色シールが外向きになるようにAフレームとをジョイント。
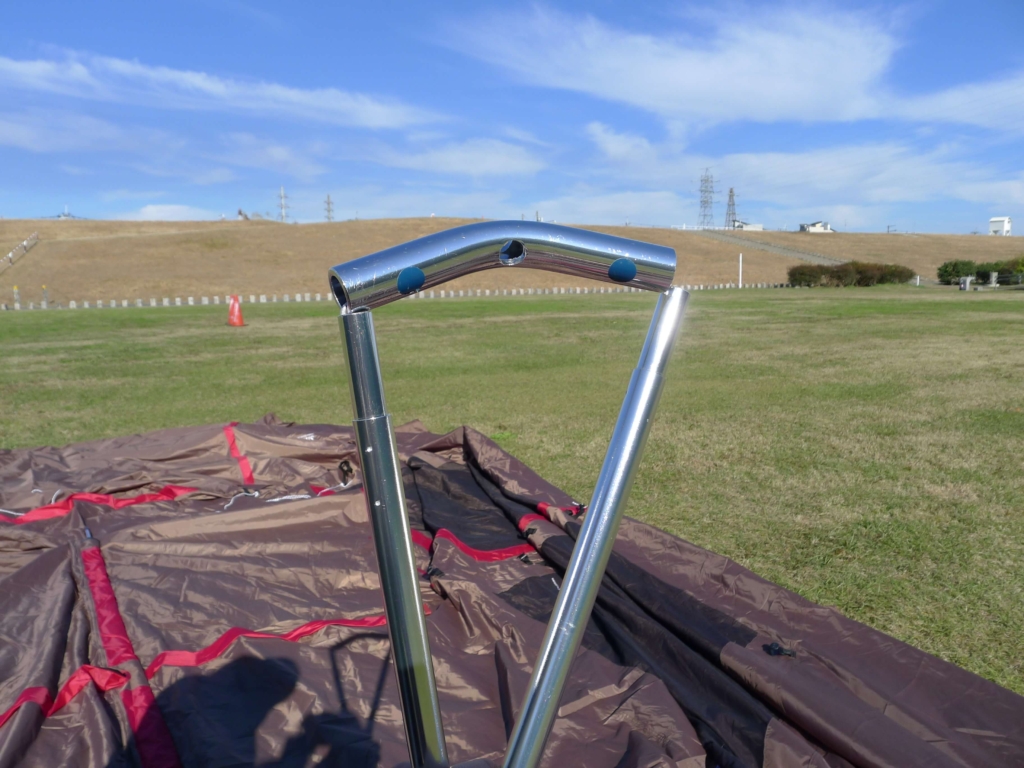
ジョイント部は「へ」の字方向で挿入してください。「V」の字方向でジョイントすると、この後テントを立ち上げる際に無理な負荷が掛かり、Aフレームリッジポールが変形する恐れがあります。

私たちは初めての設営時、Aフレームを反対向きで接続。みなさんは注意してください。
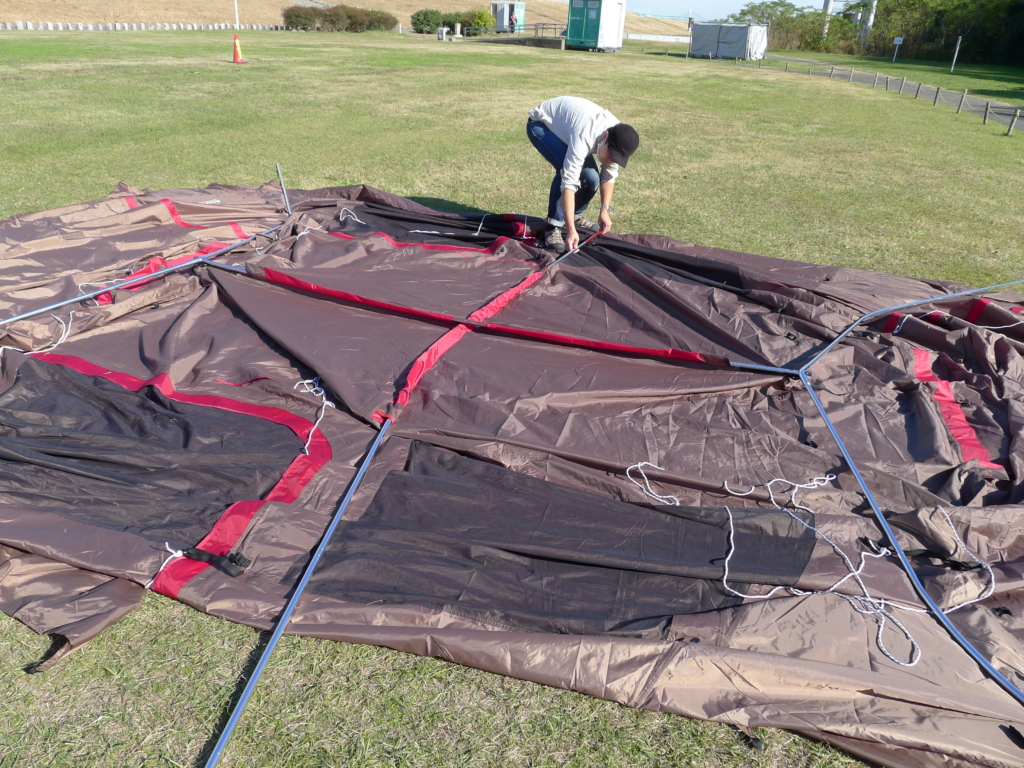
Aフレームリッジポールの先端にセンターリングを掛ける
センターリングのテープ は両側取付けてから締めてください。
片方取付時に締めてしまうと、反対側の取り付け時にきつくて取付が難しくなってしまいます。
反対側も取り付けてから締めましょう。
Aフレームは全て組み立てず、Aフレームリッジポールとの連結後に繋げると作業性アップ!
フレームを全て接続してしまうと、Aフレームリッジポールとのジョイント時に負荷がかかり、やりづらいです。
Aフレームリッジポールを挿入後、Aフレームのポールを全て繋げた方が作業性が良いです。
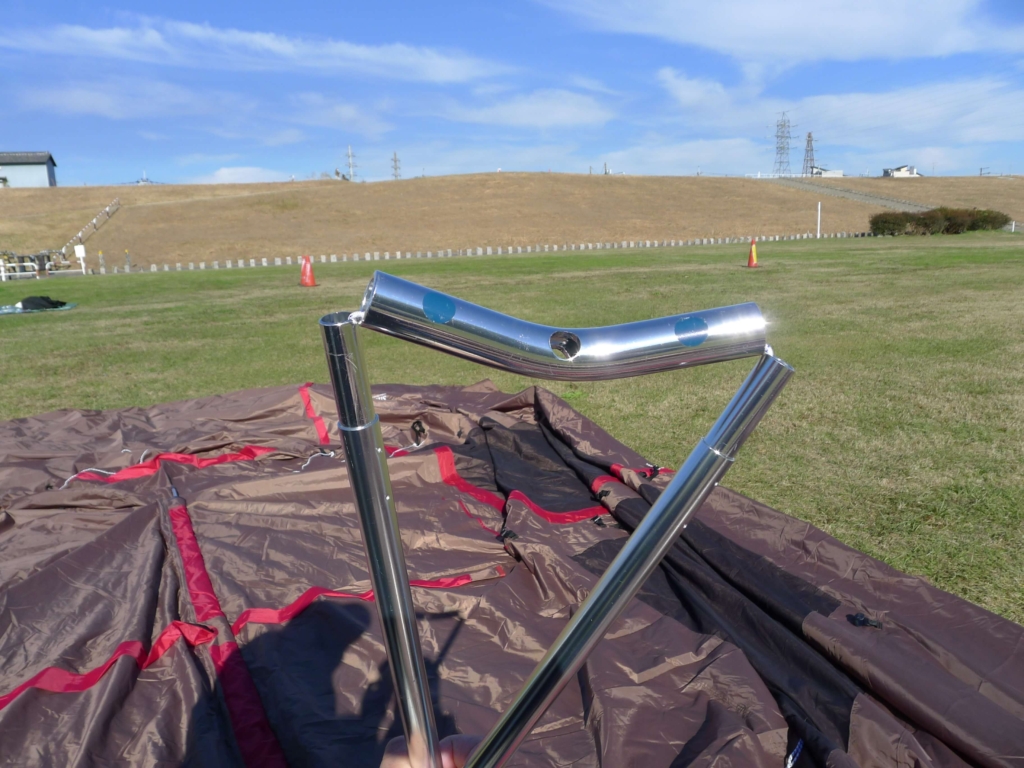
Aフレーム取り付け後の写真
ここまでの工程でこのような状態になっていれば問題ありません。
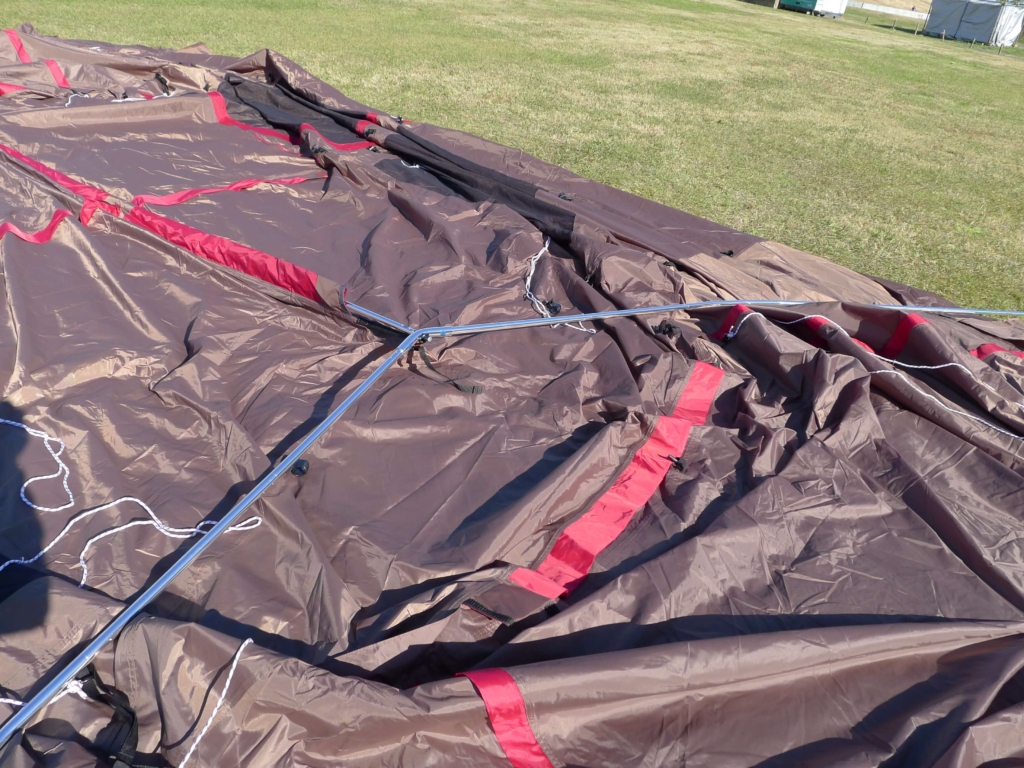
センターフレームの差し込み
センターフレームをセットします。
取扱説明書ではこの段階でセンターフレームをセットしませんが、このタイミングでセットすることをオススメします。
センターフレームは先端が赤色のポールです。
本体中心部の赤色テープが付いたスリーブに通します。
Aフレームと十字にクロスするイメージです。

上部のフックを取り付け
テント上部フックのみ、この段階で取り付けます。合計6箇所です。
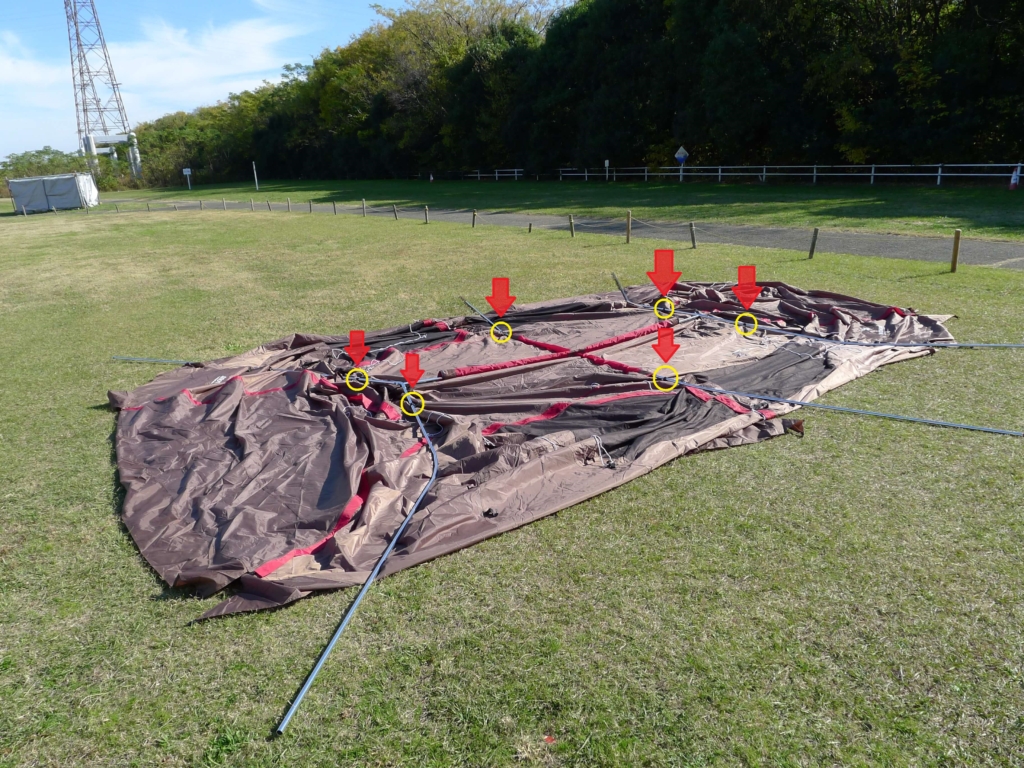
フックは「パチンッ」と押し込んでセットするだけでOK!
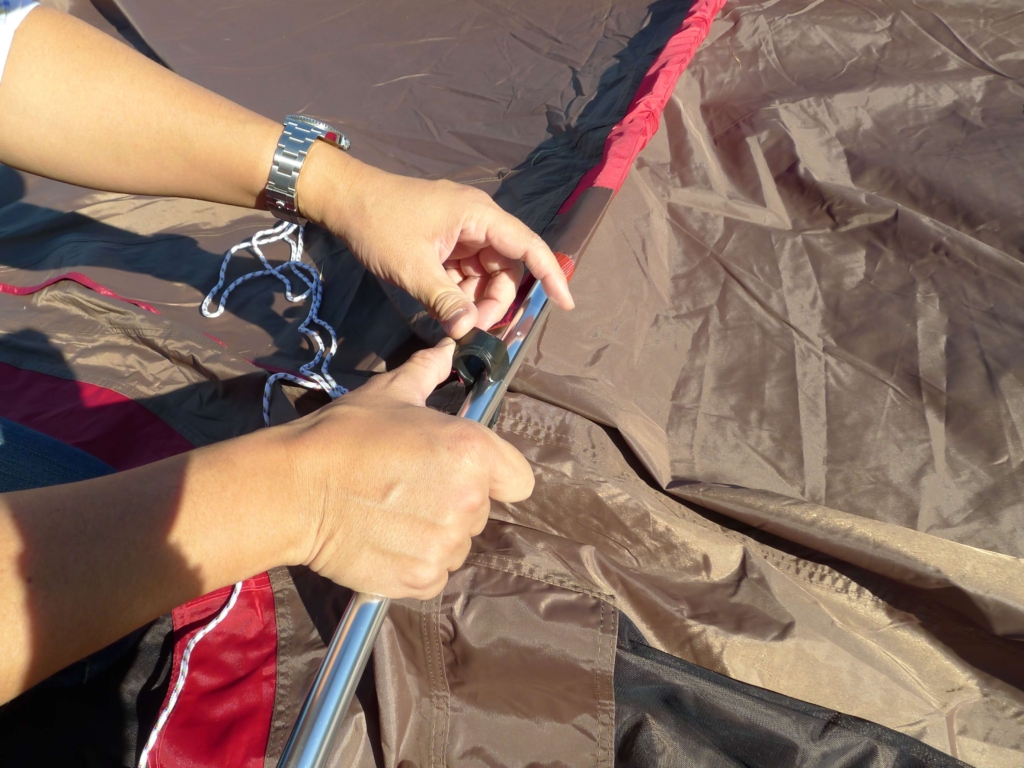
Aフレームにリングピン取り付け
 ゴエ
ゴエいよいよここから、テントを立てていきます。
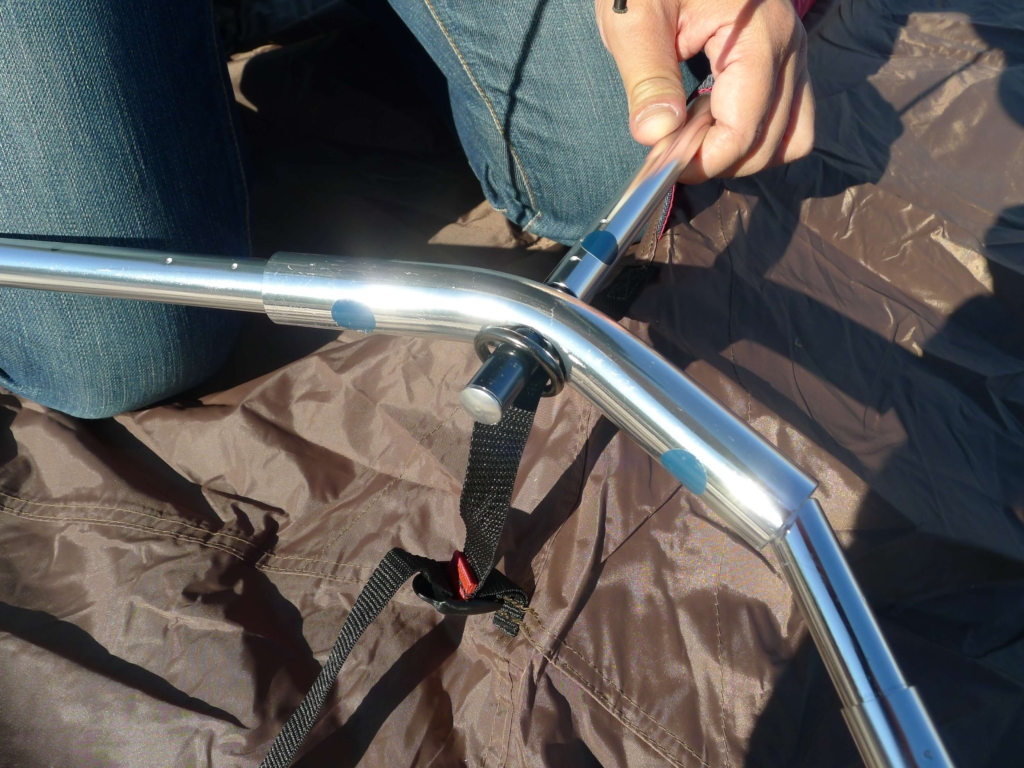
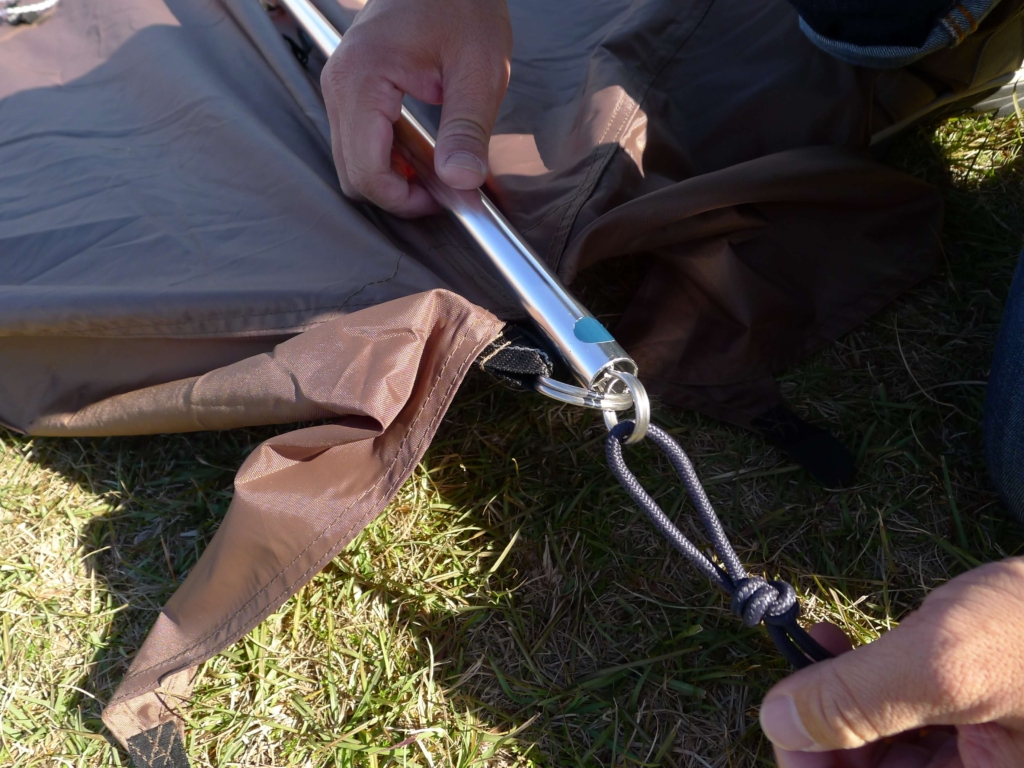
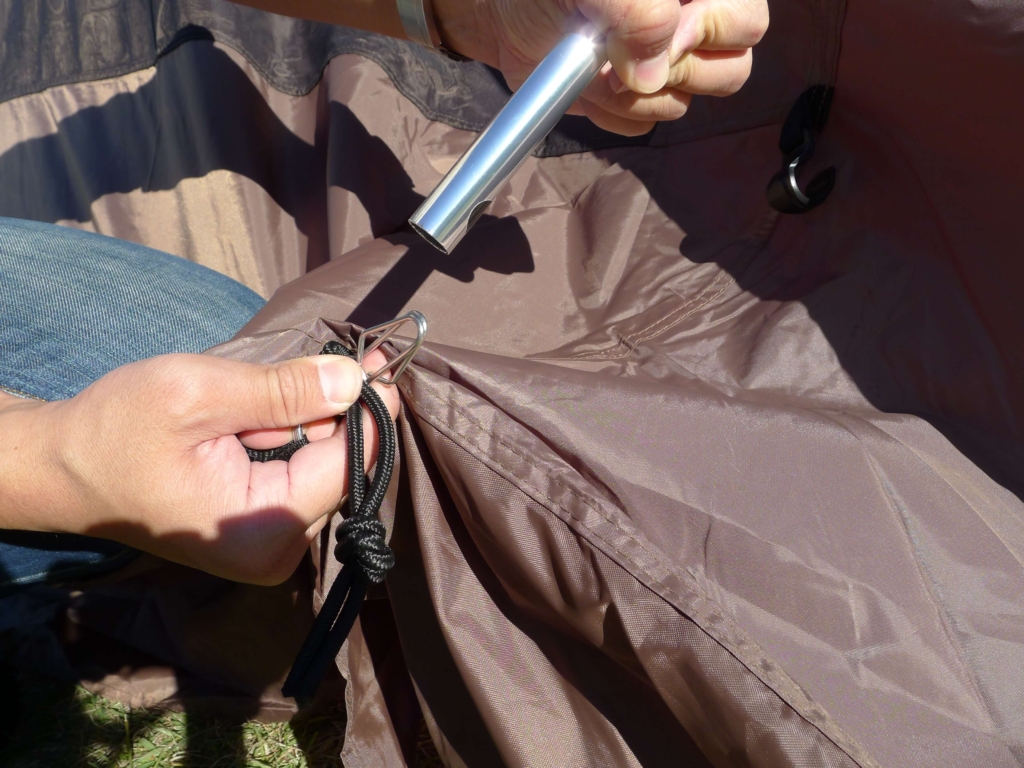
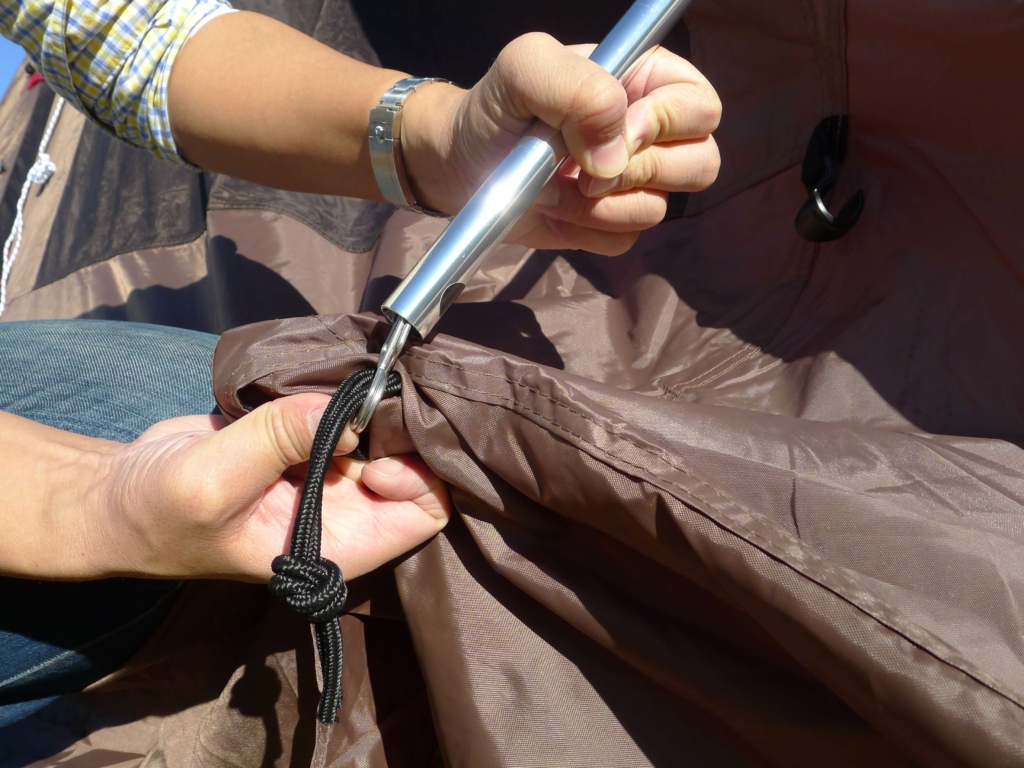
本体裾部の紺色ロープが付いたリングピンをAフレームと連結します。
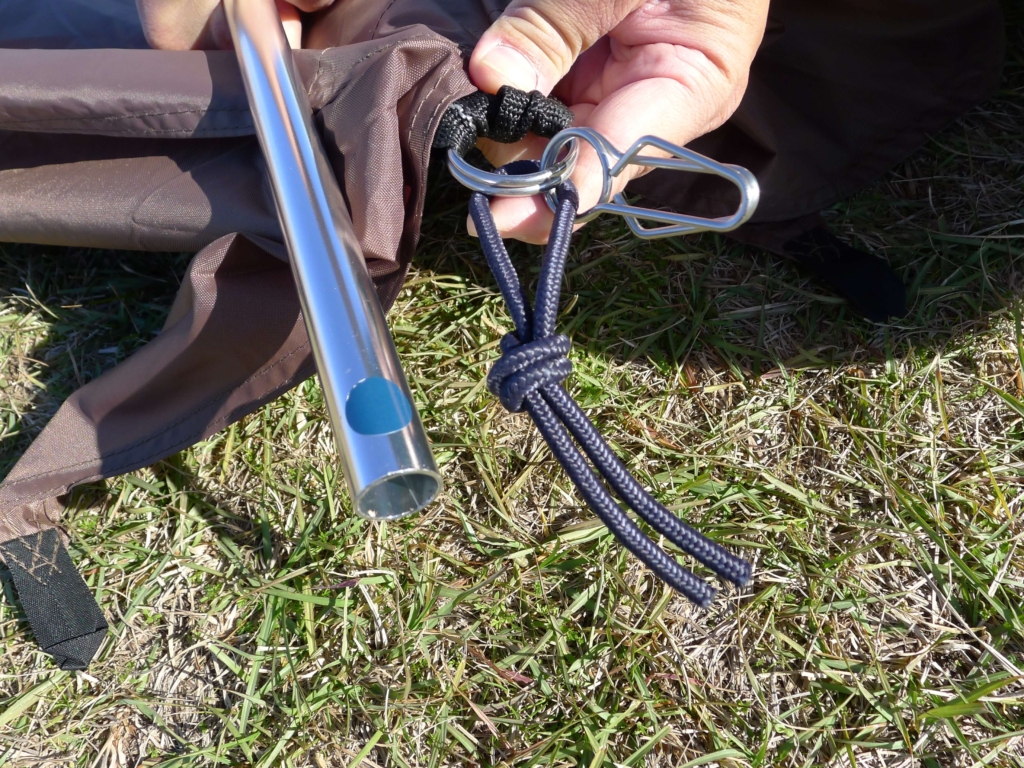
ペグダウンロープとリングピンが絡まっていると、ペグが打ちづらくなってしまいます。
意識してないと、絡まっていることが多いので要注意です。
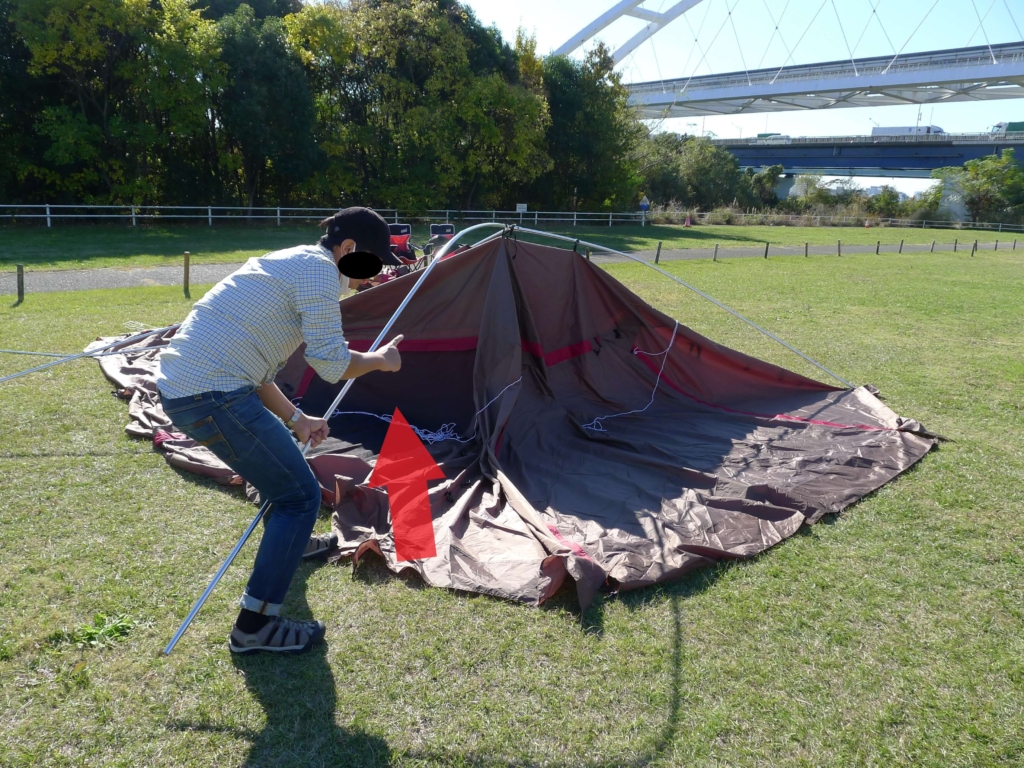
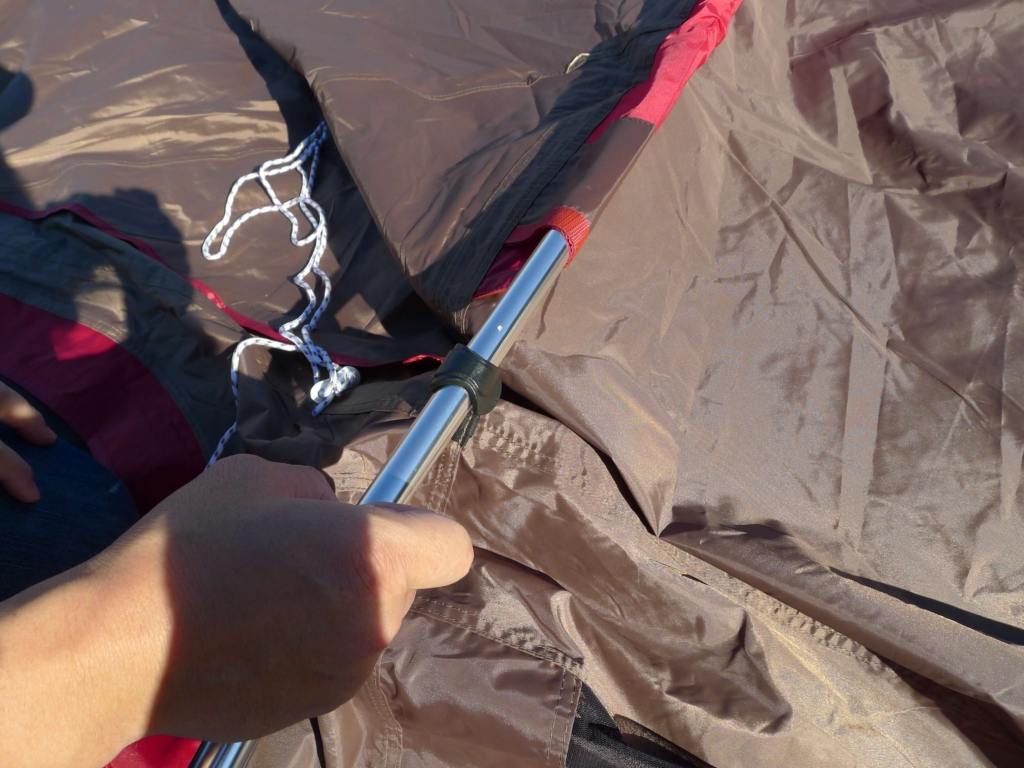
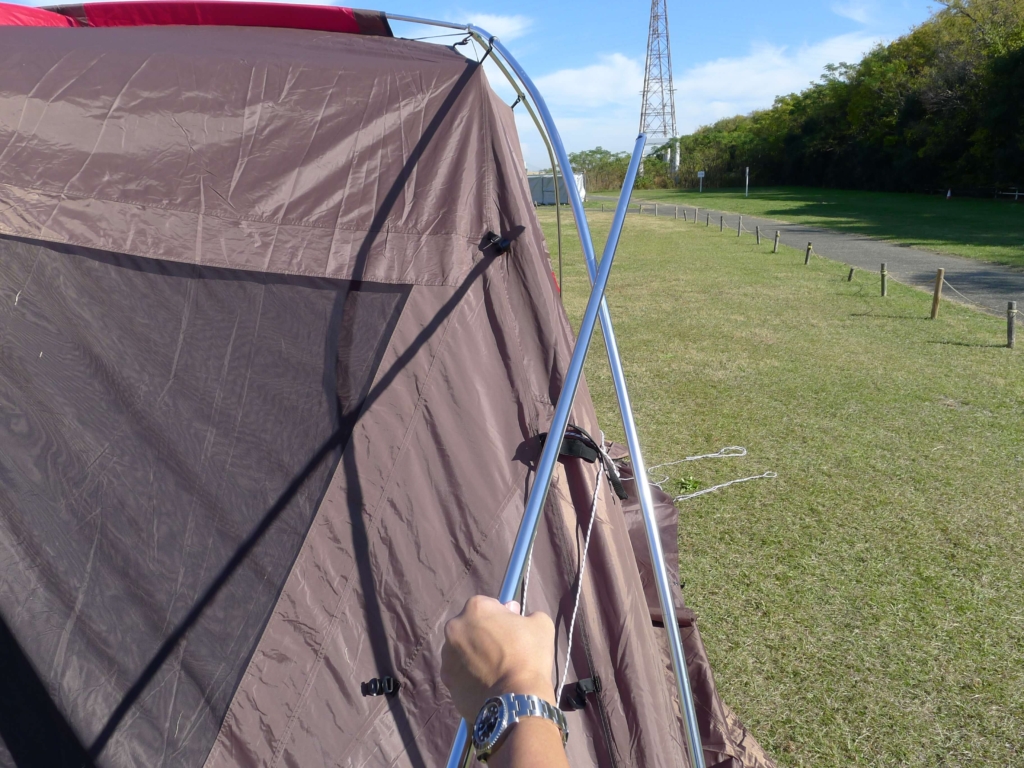
Aフレームを上方向に持ち上げるようにして少し上にあげます。
テントの重みがあるので、完全に持ち上げることは難しいので少しで大丈夫です。
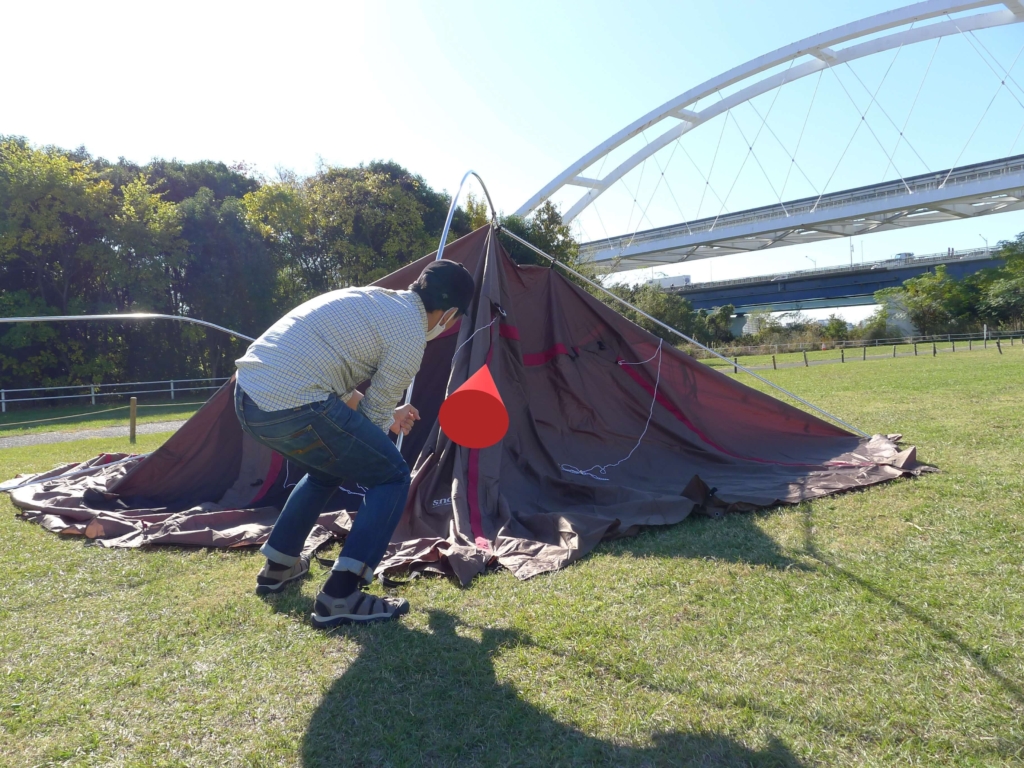
Aフレームを前方に押し込むようにして力を入れるとテントが起き上がります。
リングピン挿入は少し力が必要です。手のひら全体で押し込み手のひらや指を挟まないように注意してください。
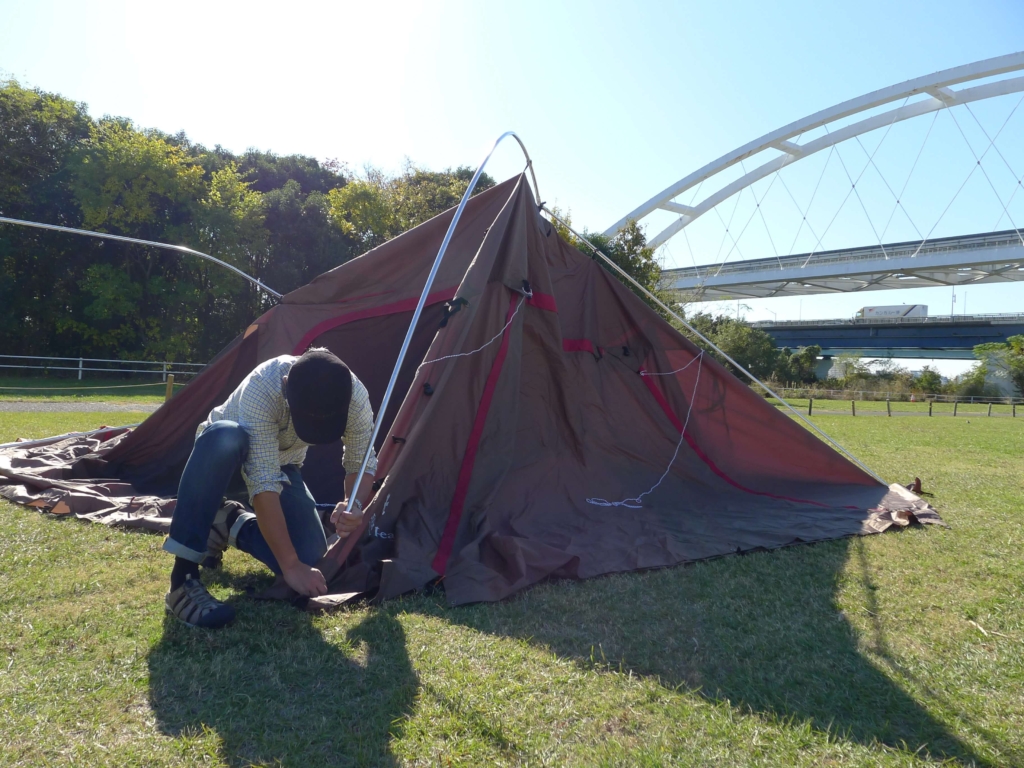
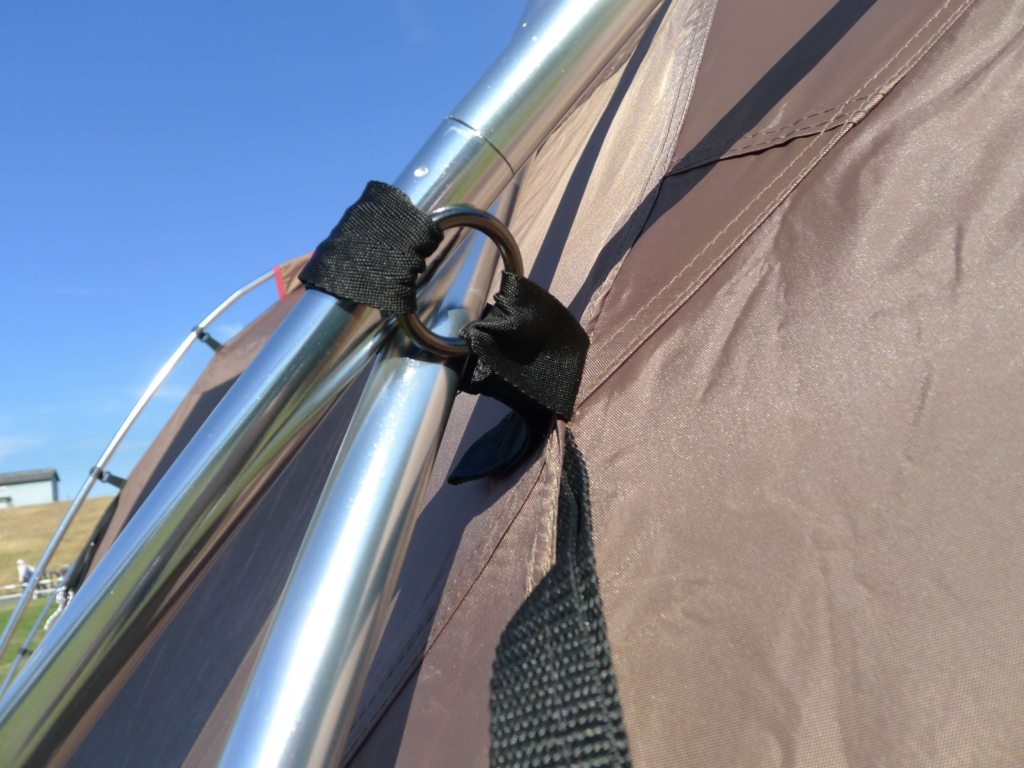
センターフレームにリングピン取り付け
赤色ロープが付いたリングピンをセンターフレームに取り付けます
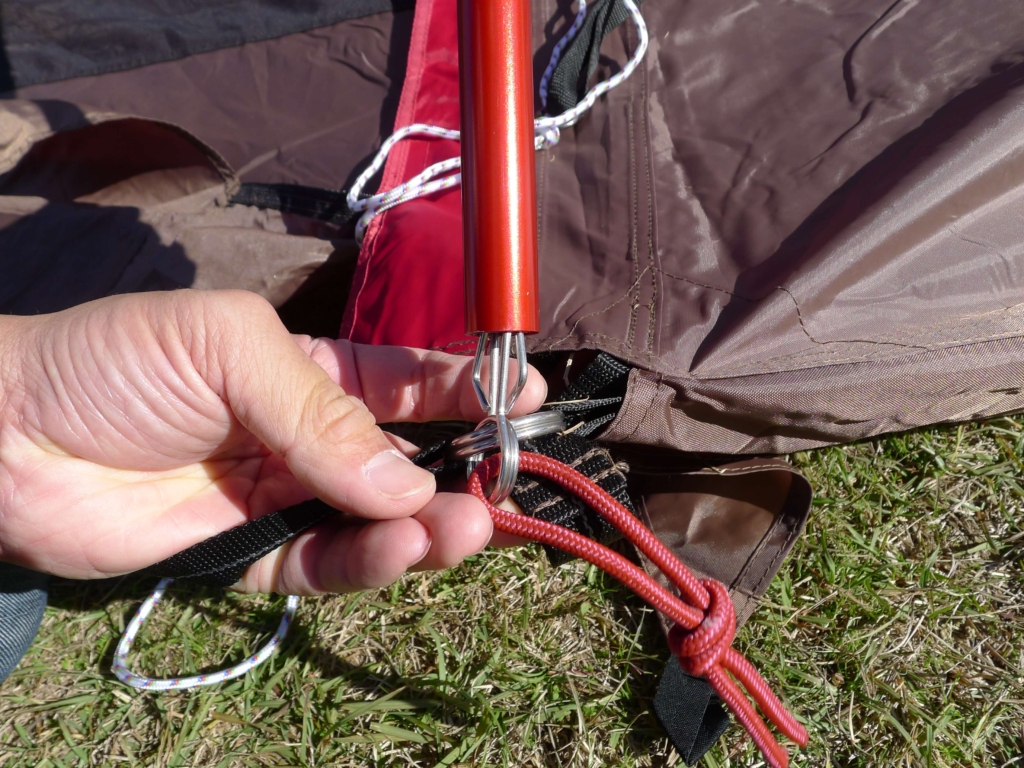
 あさねぇ
あさねぇ女性一人ではちょっと大変です。
 ゴエ
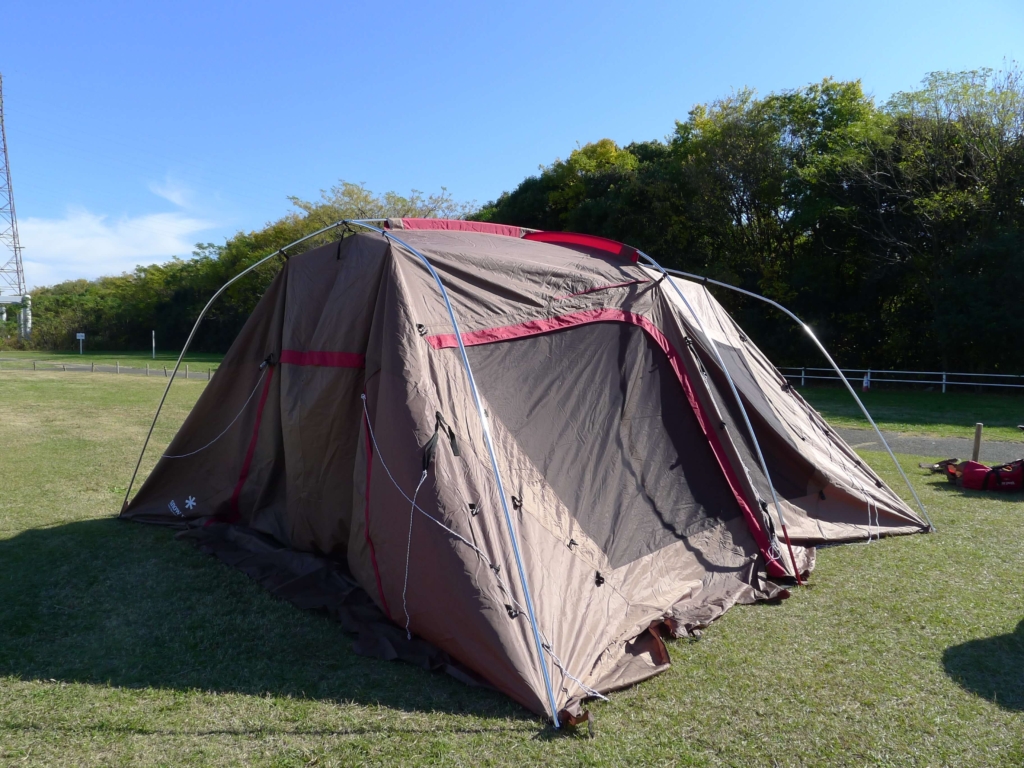
ゴエここまでくると、全体感が見えてきますね。
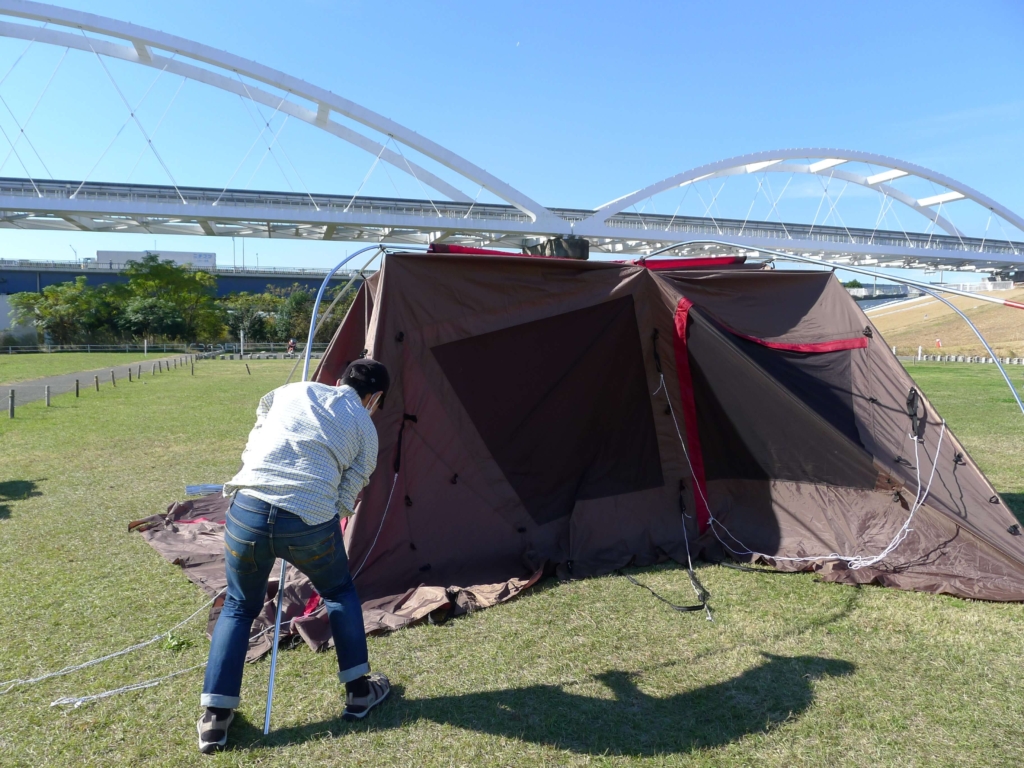
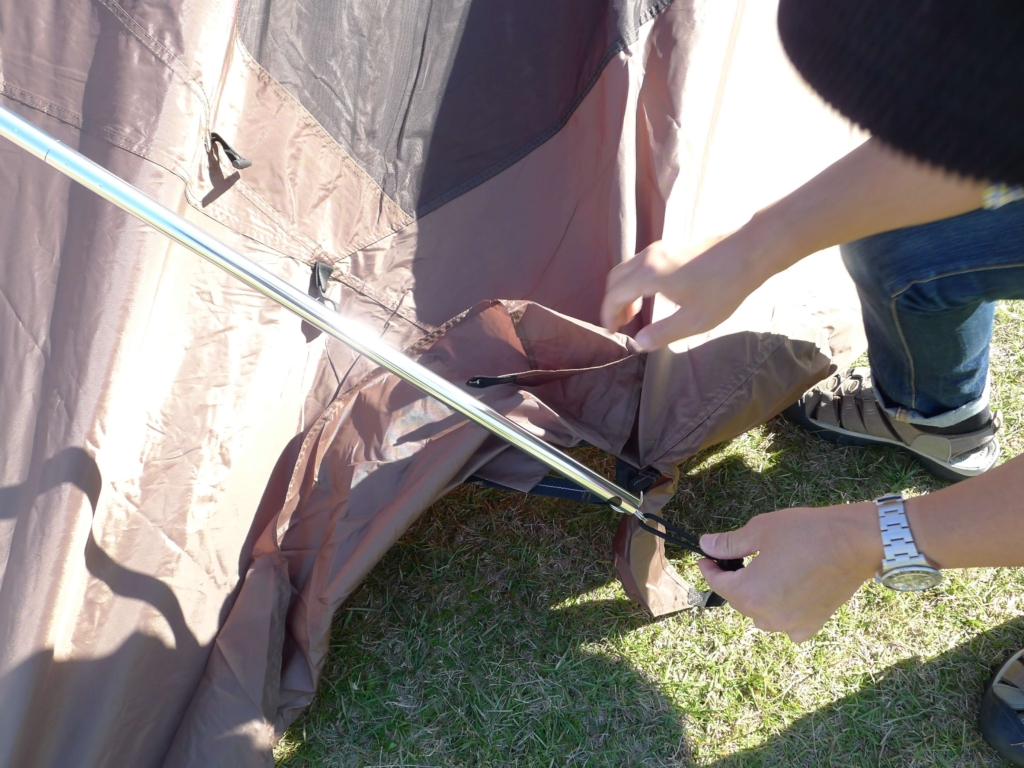
Cフレームのセット
Cフレームはフレーム両端に黒色テープが付いたフレームです。

Cフレーム両端にリングピンを挿入します。
反対側にも同じ方法でCフレームをセットします。
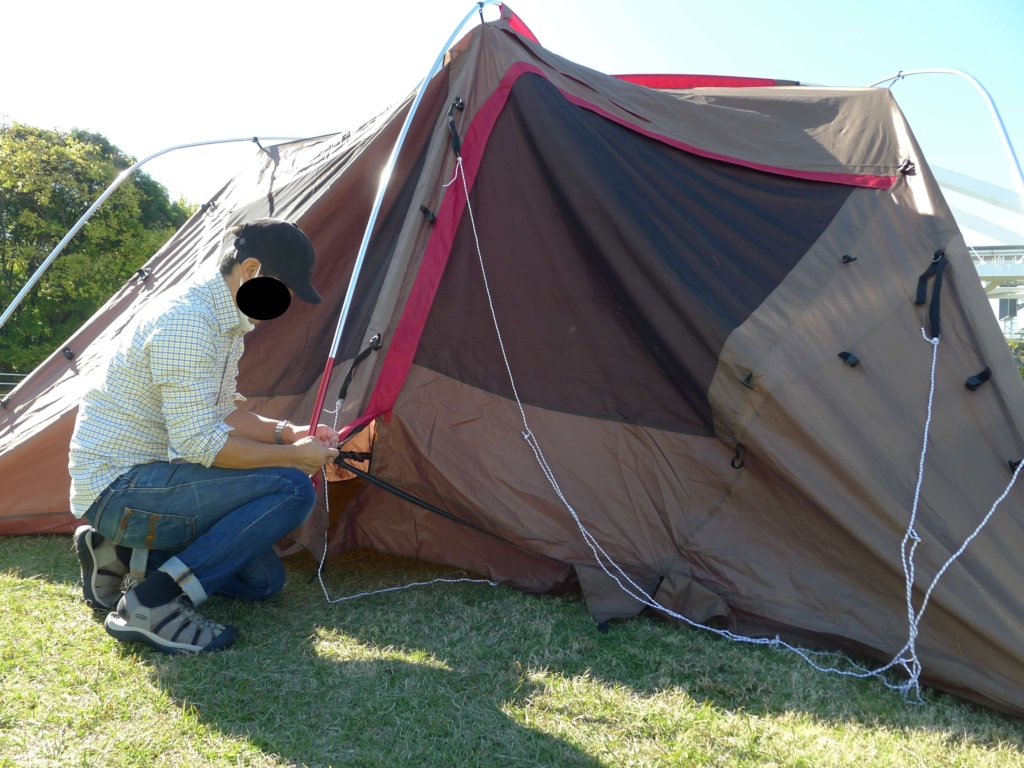
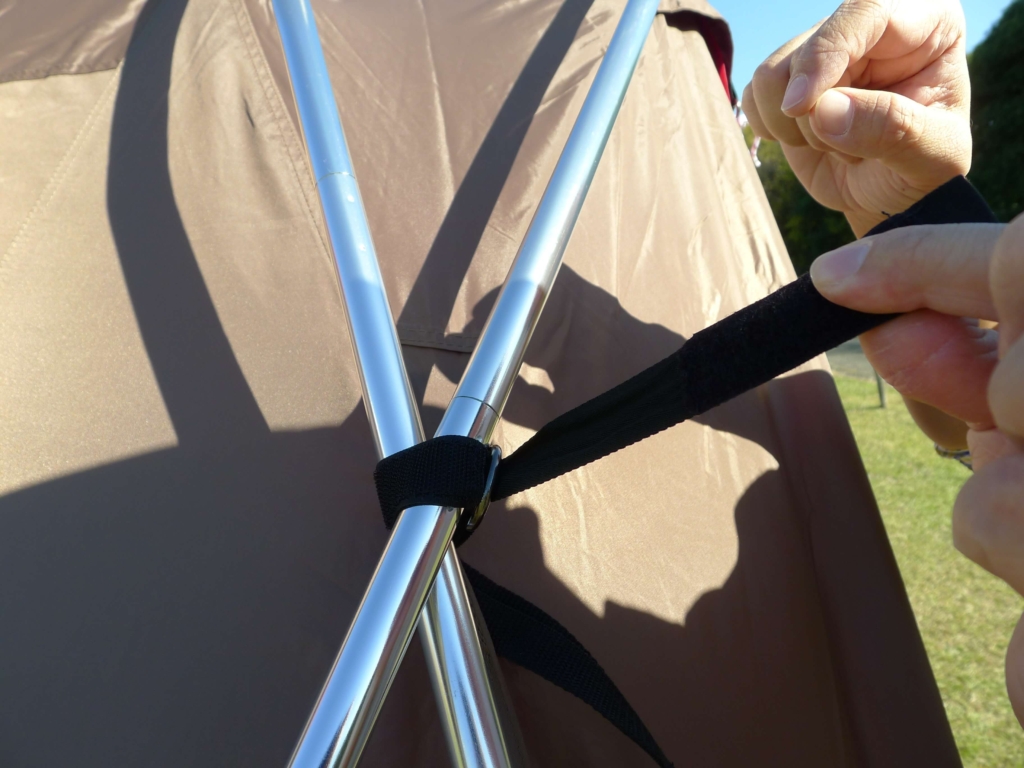
ポールとテントを固定
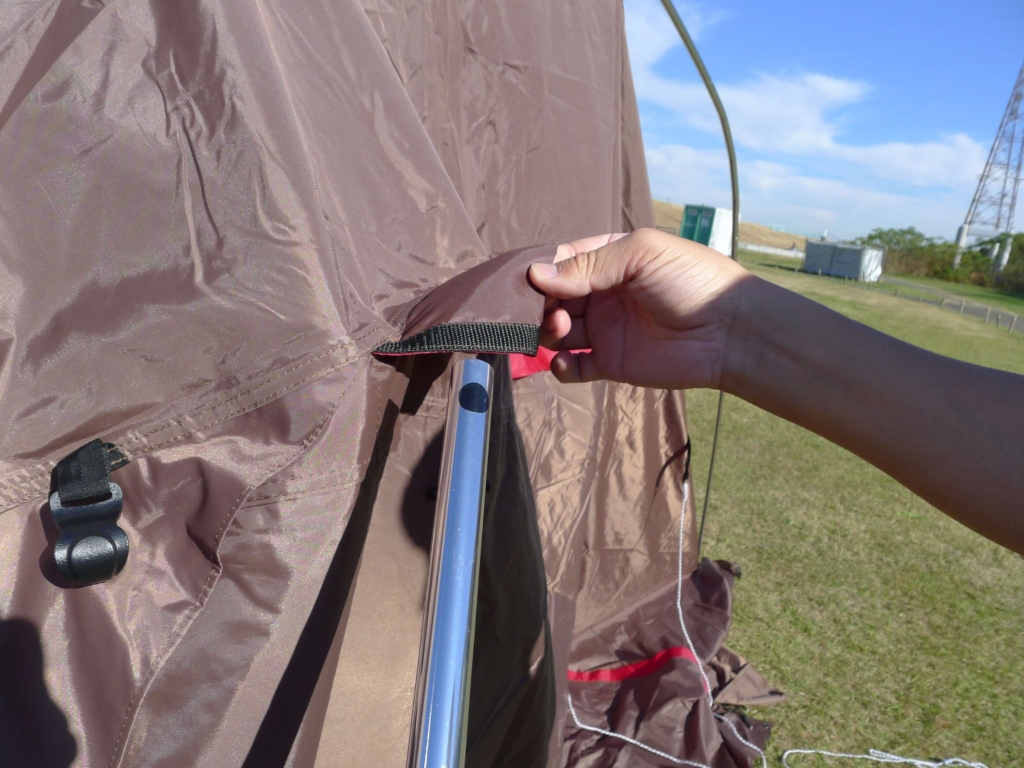
全てのフレームにフックをセットします。
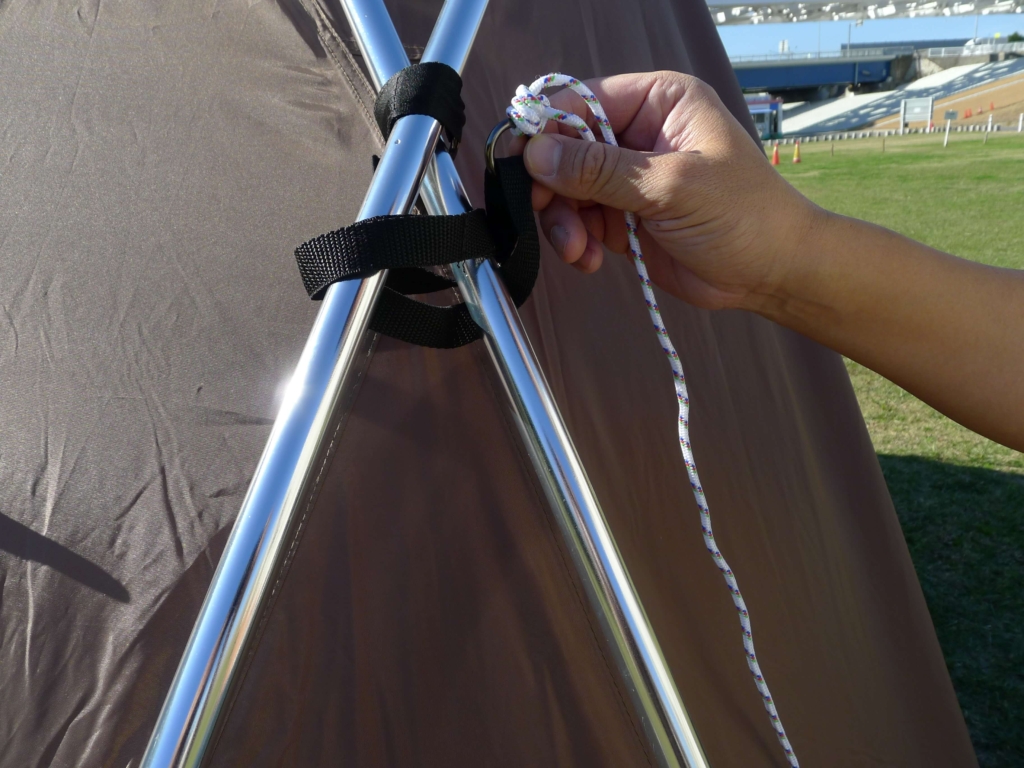
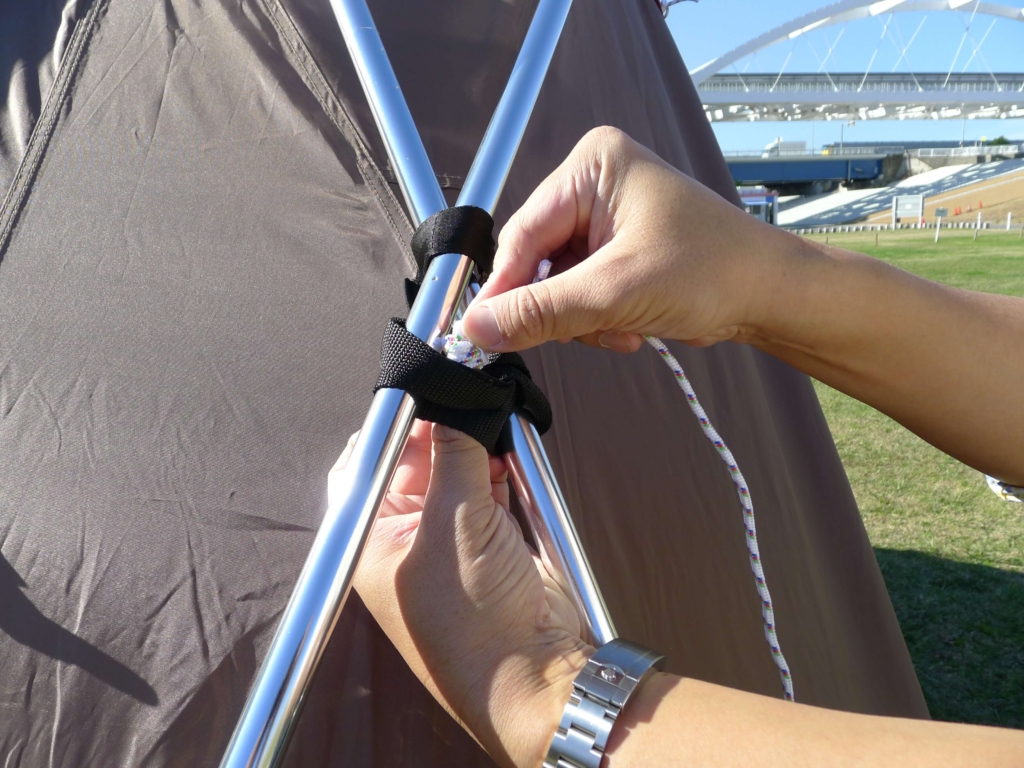
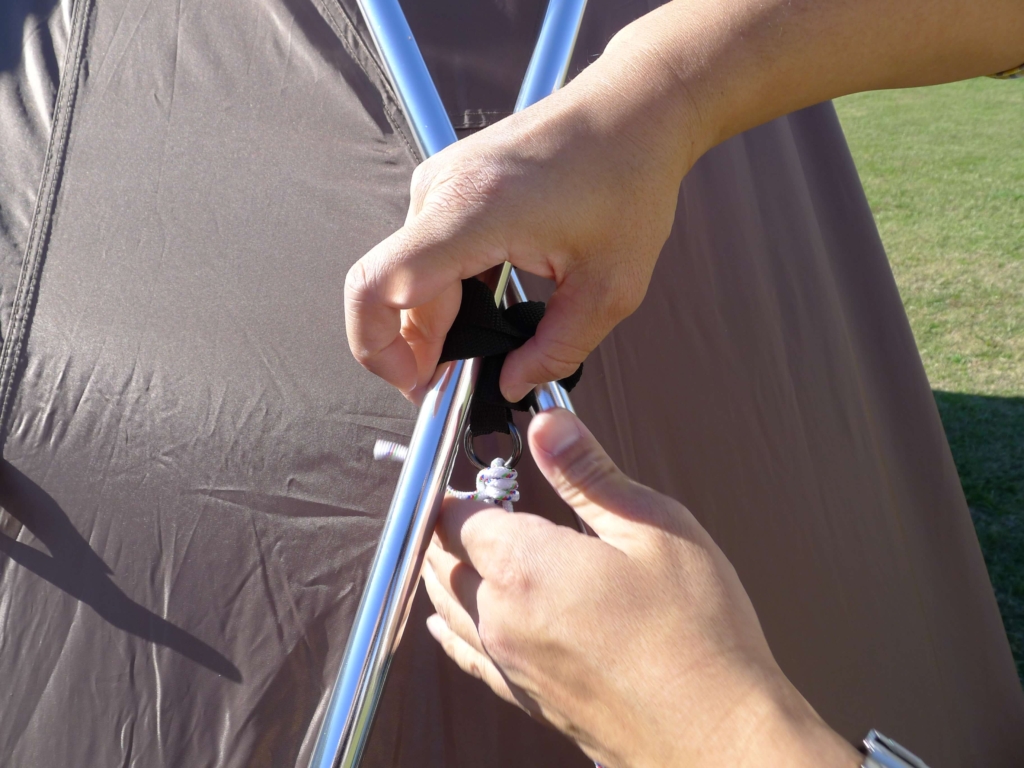
AフレームとCフレームの交差部分はテープで固定してください。
ペグ打ち
ペグ打ちは下図の順番で中心から順に広げていくようにペグ打ちすることでキレイに張れます。
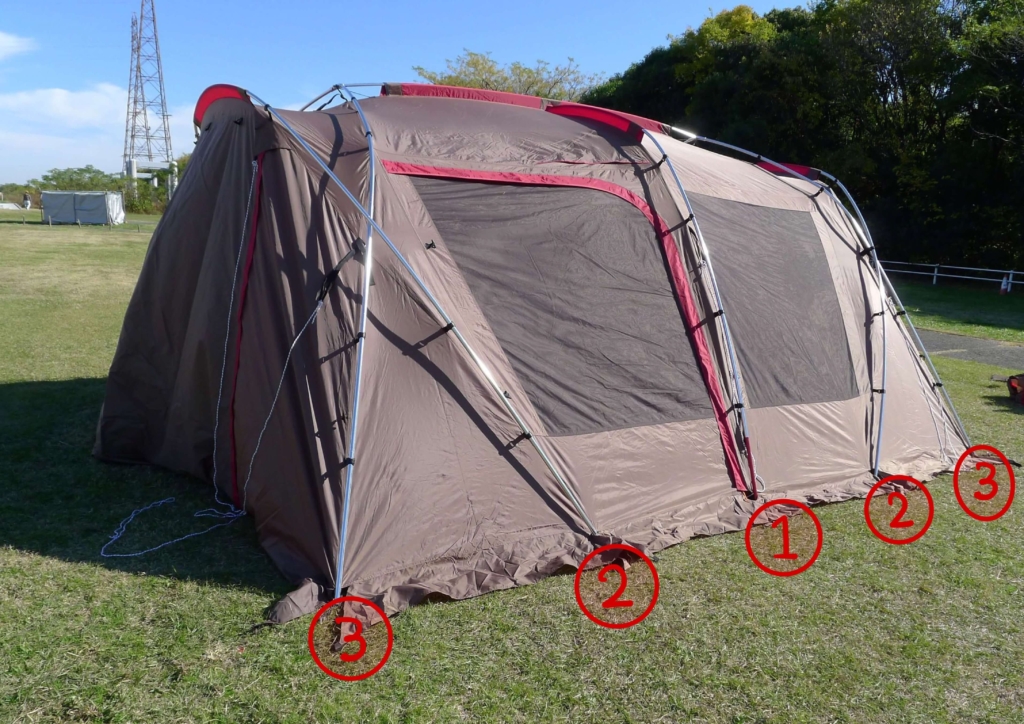
ペグは中心から外側に向けて引っ張るようにしてペグ打ちします。
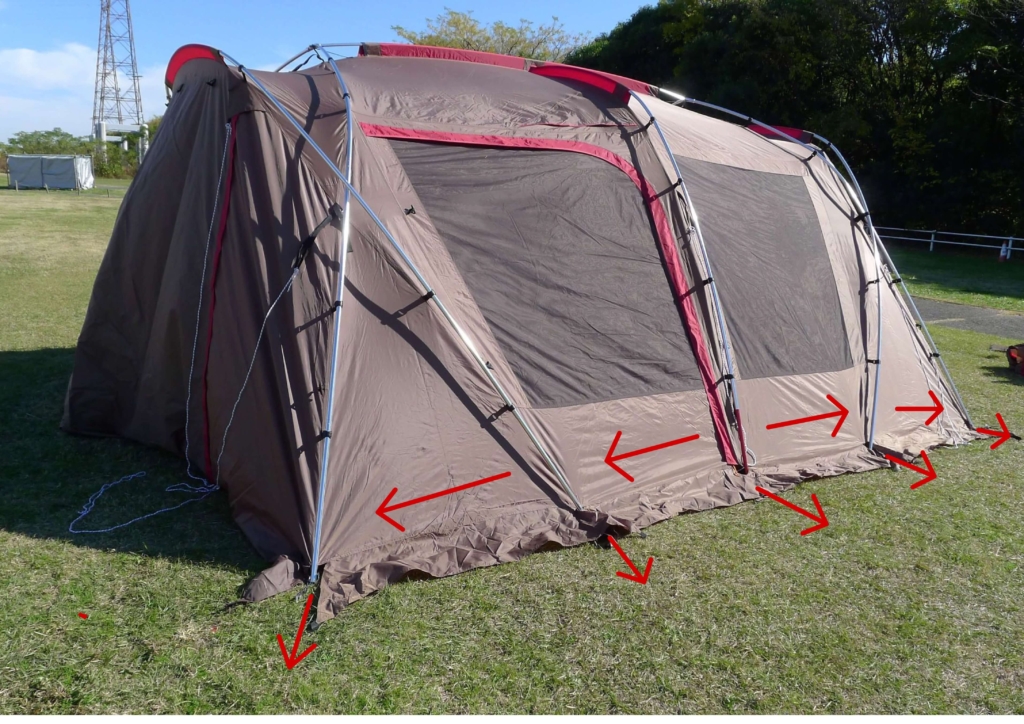
ビルディングテープのバックルを外すと、ポールの張力によって外側に広がってしまいますので、内側からペグ打ちが必要です。
ゴエ我が家ではビルディングテープは付けたまま使用していますので、テント外側にペグ打ちしてます。
我が家ではエリッゼステークのペグを使用しています。
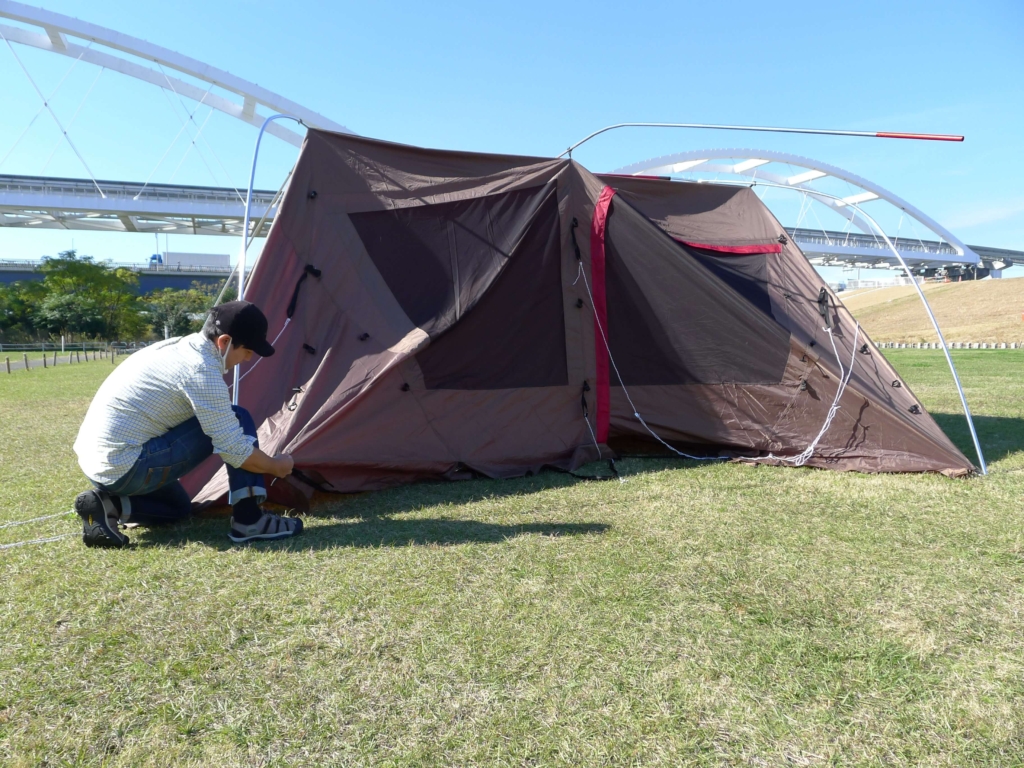
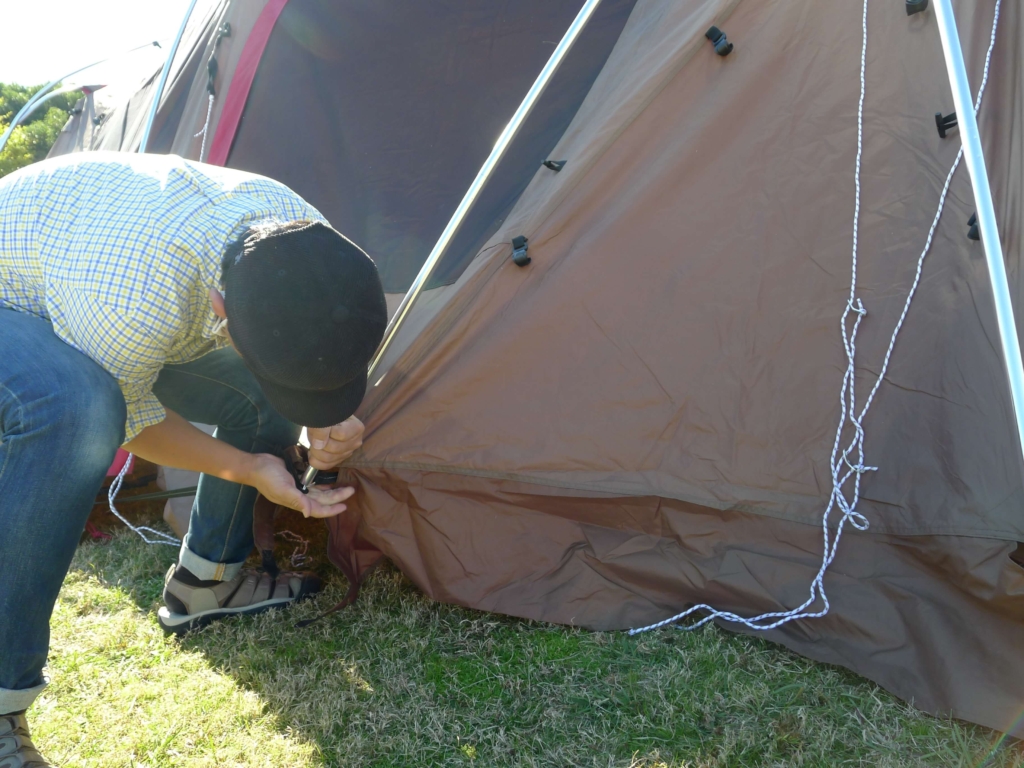
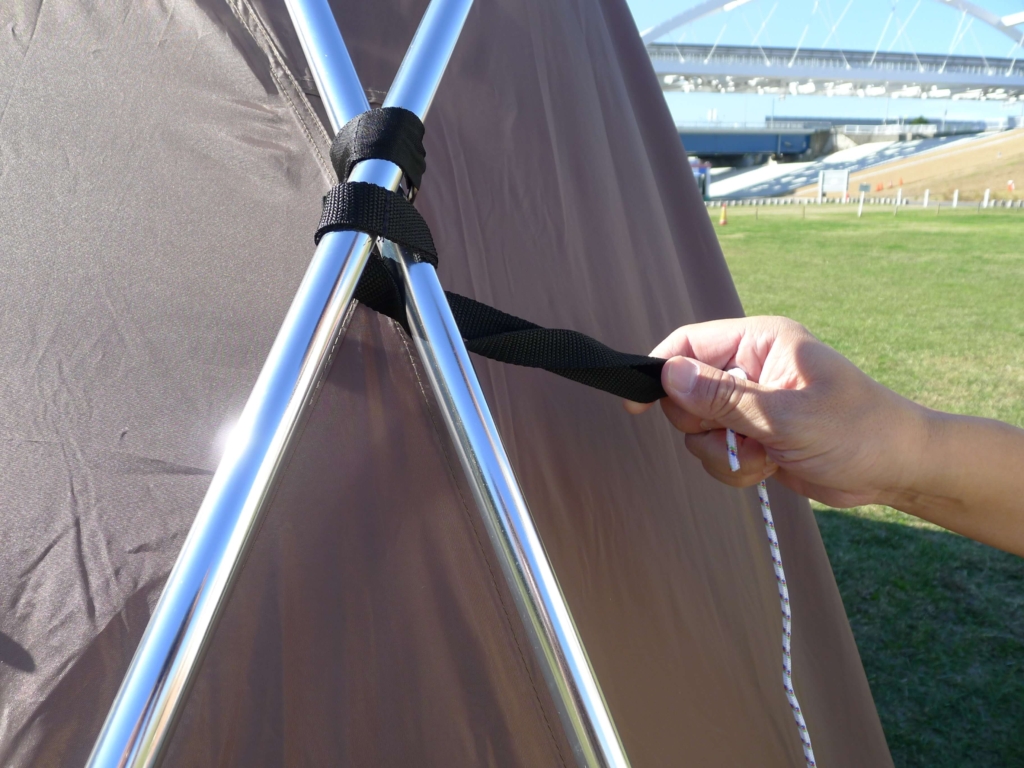
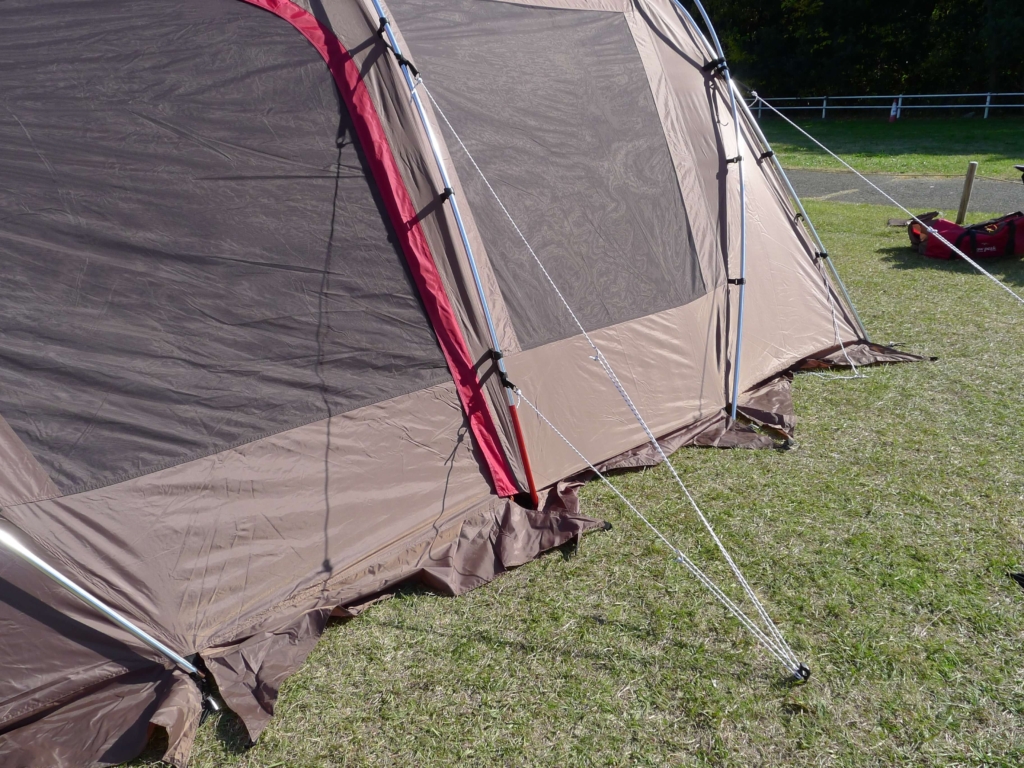
テント本体のロープをペグ打ち
各ロープをペグ打ちしていきます。
ロープはポールに巻き付けるように固定してください。
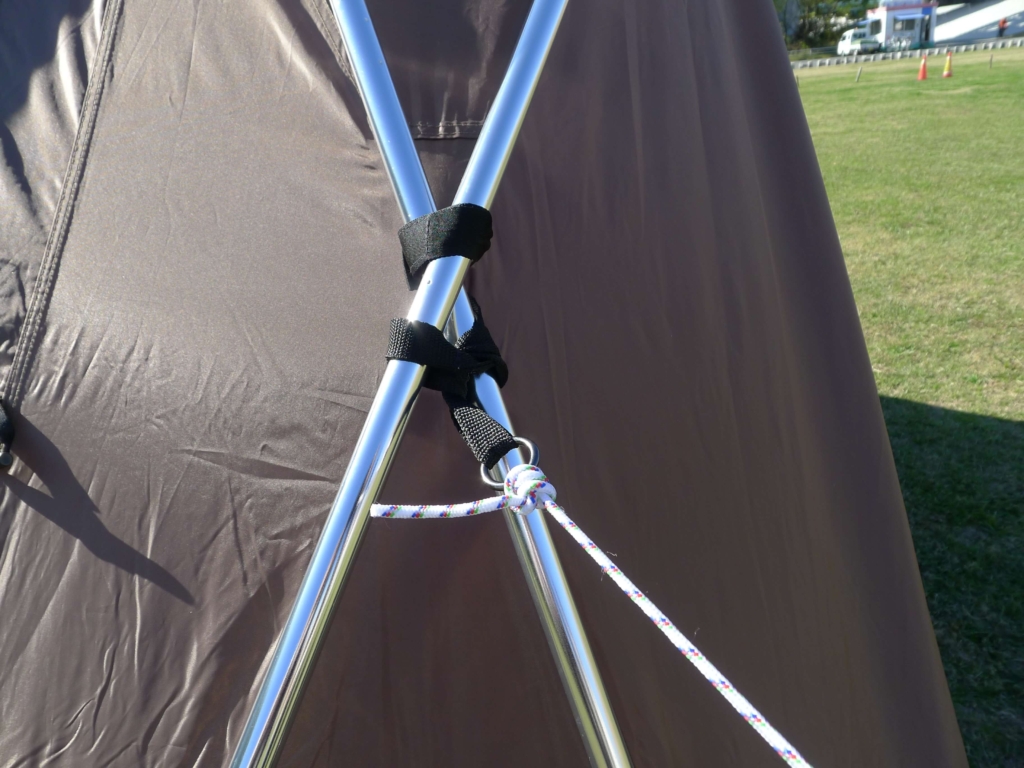
ポイント①
AフレームとCフレームの中心線上にペグ打ち
ポイント②
センターフレームのロープは上下まとめて1箇所でペグ打ちでもOK
 あさねぇ
あさねぇ残りも全てペグ打ちできれば完成!お疲れさまです。
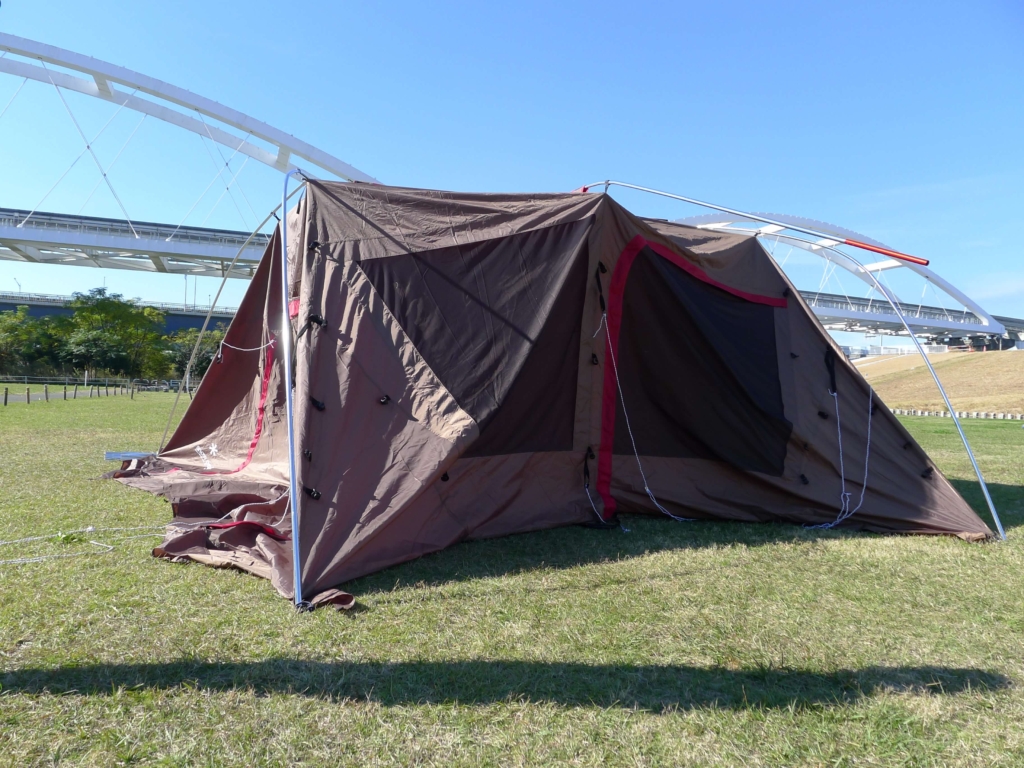
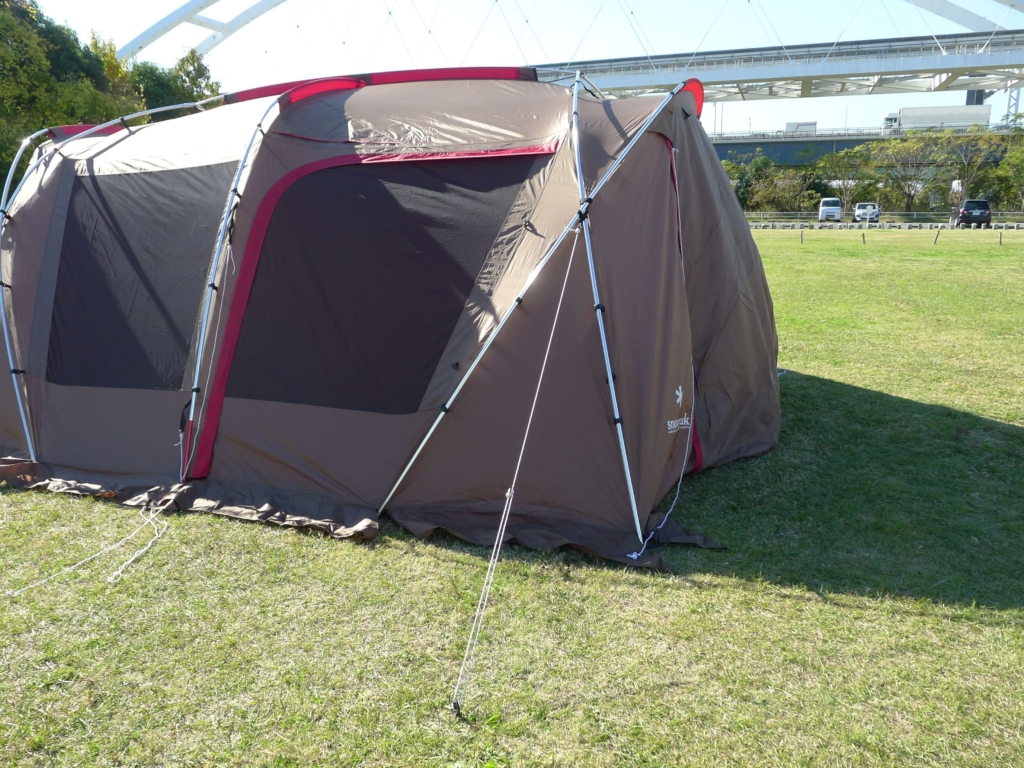
完成後の写真
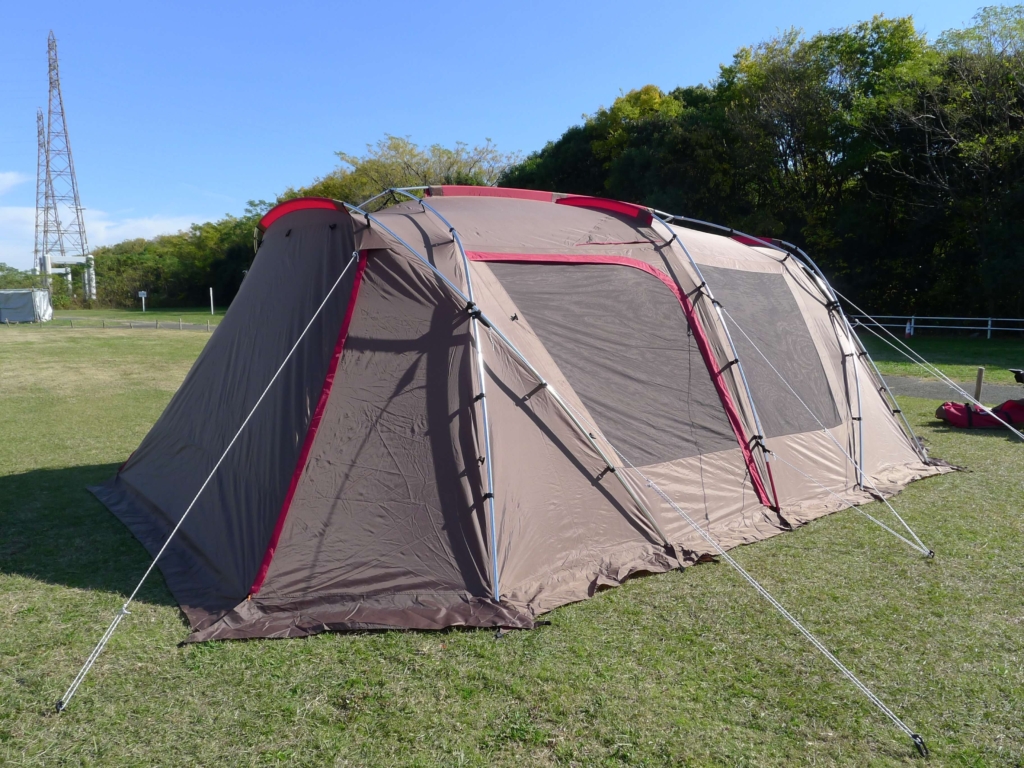

さいごに
まとめとして、下記内容には注意して設営してください。
きっと上手く設営できるはずです!
- Aフレームは「へ」の字方向で接続
- テントを起こす前にセンターフレームをスリーブに通しておく
- Aフレームを起こす際は押し込むようにして持ち上げる
- ペグ打ちは中心(センターフレーム)から外側へ順番に打つ
以上です。
ファミリーキャンプやグループデイキャンプなどで大活躍の「ランドロック」ぜひ、本記事を参考に設営してみてください。